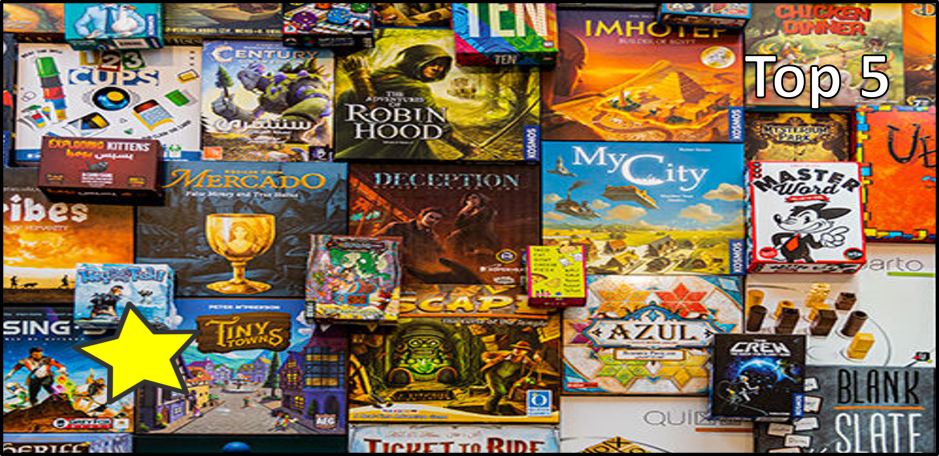
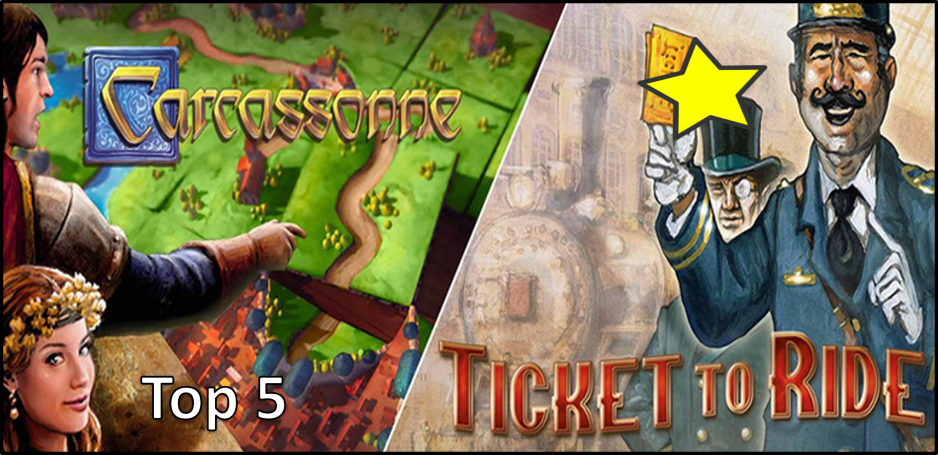
Hey, hey, Geekly Gang! Kyra Kyle here with another Top 5 Tabletop Game List throughout the years. 2001 is the year in board games we’re covering today. While 2001 saw a lot of great games, I don’t see as many of them played as much today. And yet, 2001 in board games set industry standards and even introduced one of the most interesting game mechanisms. We’ll get to the games in a bit, but first, let’s review our list’s criteria.
1: Cultural relevance plays as much of a factor as overall quality. A game might make a list that doesn’t hold up to others of its type, but you must admit the game is everywhere.
2: Only one game from a franchise makes the list. This will become more of an issue the closer we get to games with expansions.
3: Longevity plays a role, too. A game doesn’t have to fly off the shelves today, but it had to have some widespread appeal for a decent time.
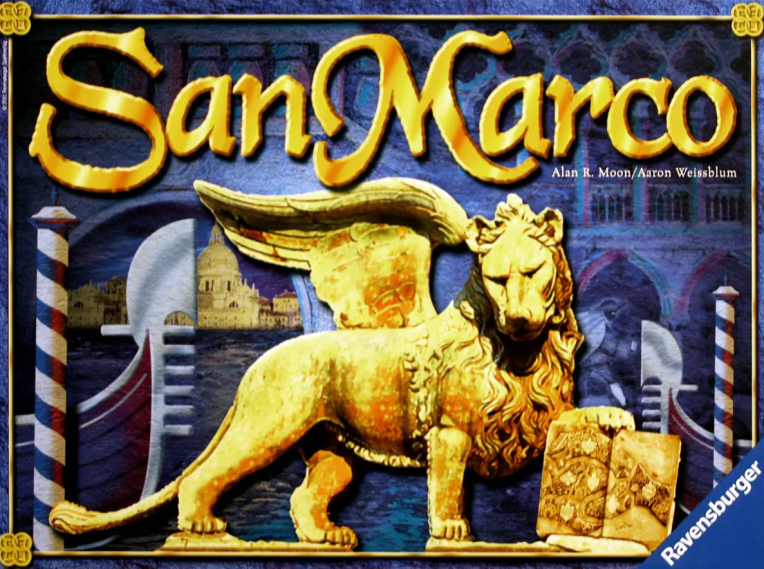
Honorable Mention: San Marco (2001)
Alan R. Moon almost makes one of these lists again—he won’t need to wait long for another entry—and while San Marco helped popularize area control and card drafting as game mechanisms, it’s since been overshadowed. San Marco won a handful of awards, but it just missed out on our list.
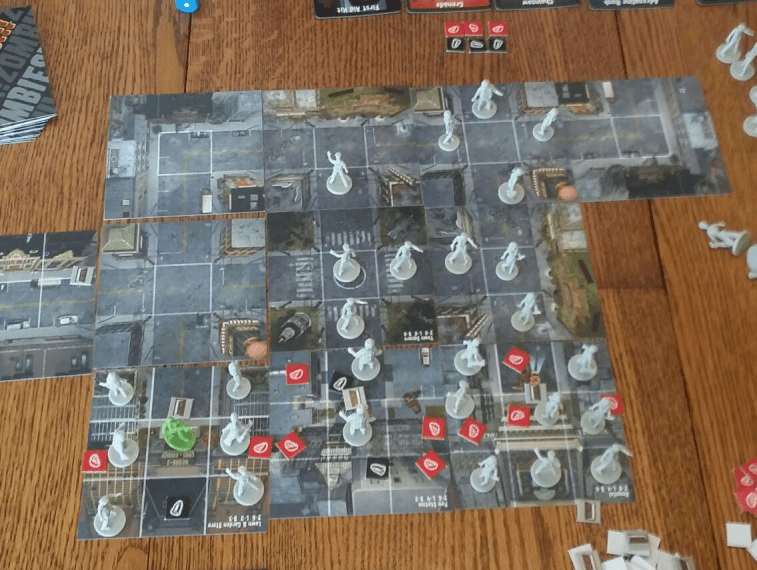
5: Zombies!!! (2001)
We begin 2001’s Top 5 Board List with Zombies!!!. This design by Todd Breitenstein still has its defenders today, but many Zombies!!! Fans have moved on to another game that will most likely make one of these lists: Zombiecide or Dead of Winter. You can’t deny Zombies!!!’s influence on the board game industry. It proved a miniature or standee-heavy game could make bank, solidified zombies as a board game theme (Zombies!!! was one of the first zombie games), and its use of tiles as terrain has been duplicated for decades.
Zombies!!! cornered the market for zombie board games for well over a decade. It shocked me that no other board game attempted to claim Zombies!!! throne until 2012.
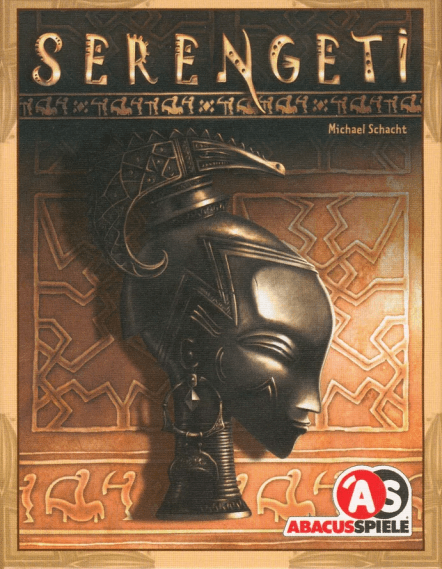
4: Serengeti (2001)
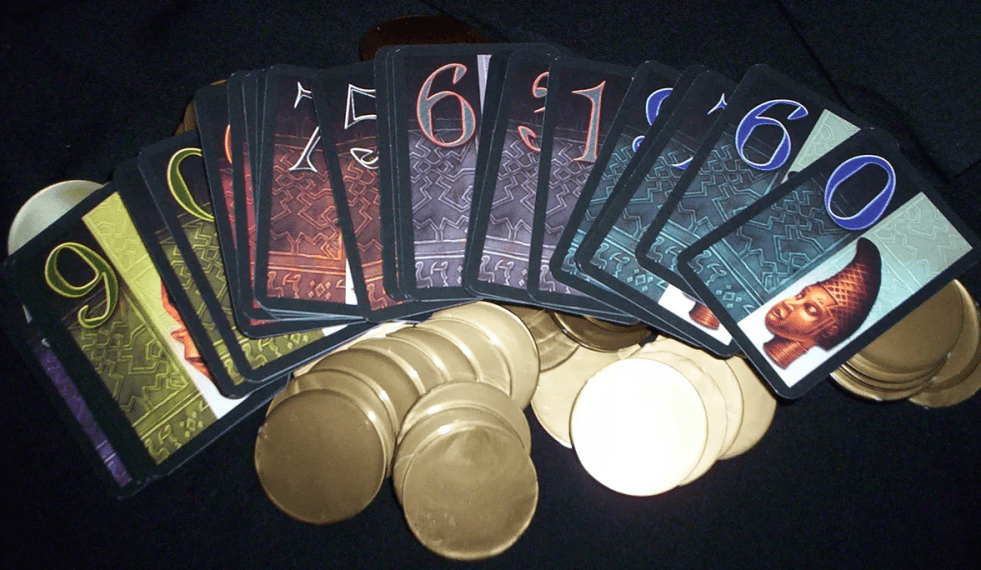
Serengeti has the opposite problem of Zombies!!!. While Zombies!!! makes this list for its cultural relevance and lacks a standout game mechanism, Serengeti offers a fantastic twist for an auction and payout mechanism and often gets forgotten, in part, because it got rethemed as Don (a gangster game). Both games made the list, but just barely.
Players bid for African art (sensitivity may be the reason the game got rethemed) with the local currency “Hongo.” Players may not bid a number whose “ones” digit matches the number on any card they previously won. The payout mechanism is that players owning a card whose number matches the “one” digit gain a share of the bid. Serengeti has this nice push-pull of wanting to acquire lots, but it matters when you obtain the lot, because you stand to gain a kickback every time someone else gains a similar lot. It’s no wonder Serengeti won several awards as the best card game of 2001.
3: Evo (2001)
I struggled figuring out where I should place the next three games. You could invert the rankings of all three of the next three games, and I’d agree with you. Regardless, I had to put these games in some order, and we begin with Evo. You control the survival and evolution of dinosaur species named Dinos. Guide their migrations, perfect genes to develop and mutate your Dinos, and push out other creatures to become the “dominant species.”
Another board game would be released over a decade later, Dominant Species, which owes a lot to Evo. But Evo is more streamlined than Dominant Species. I’ve heard people talk about Evo, and that’s another vote for it to climb higher on this list. Evo was nominated for a lot of awards, won a couple, and is highly regarded. Why didn’t it land higher on this list?
2: Zendo (2001)
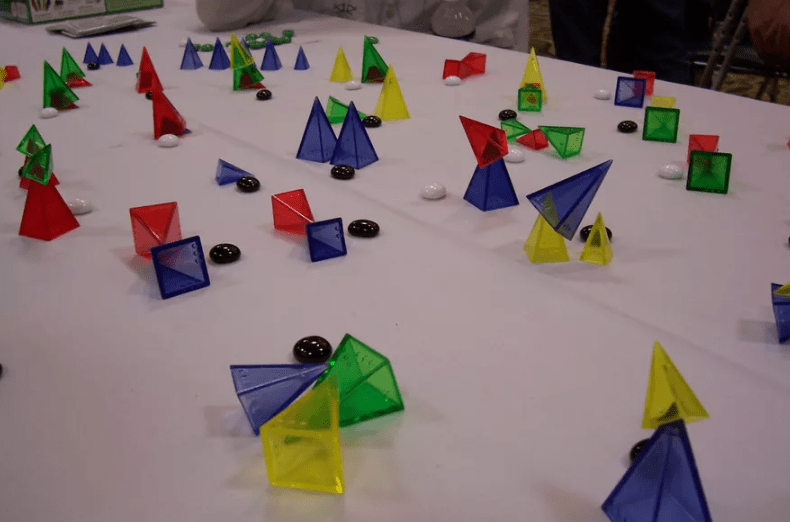
Zendo has the innovative game mechanism I mentioned at the beginning. Zendo is a game of inductive logic where one player, the Moderator, creates a secret rule (like a structure must consist of at least two pyramids) that the rest of the players figure out by building and studying configurations of the game pieces. The first player to correctly guess the hidden rule wins.
Zendo uses Looney Pyramids and was originally released as part of a group of games that could be played with Looney Pyramids in 2001. Zendo was later released as a standalone game in July 2003 and promptly won multiple awards, including the 2005 Mensa Select. Zendo makes its players think creatively. Its bizarre game components make it stand out.
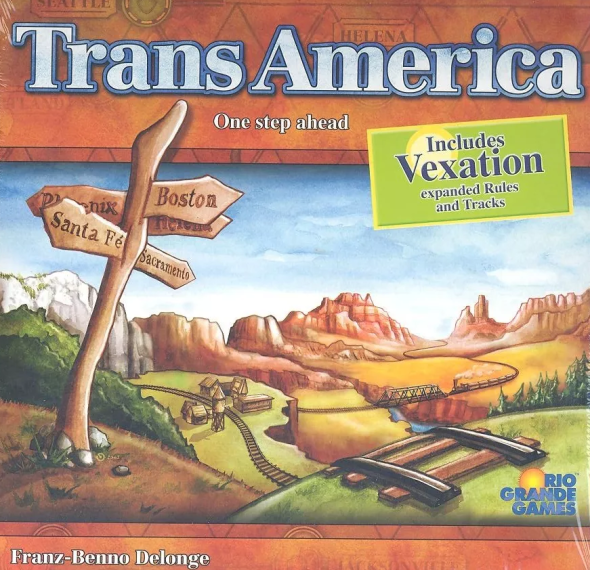
1: TransAmerica (2001)
TransAmerica is yet another board game on this list to win multiple awards. TransAmerica was even nominated for the 2002 Spiel des Jahres (German game of the Year)—I still don’t yet know how the Spiel des Jahres committee determines when a game is eligible—and just barely missed. Like Zendo, TransAmerica earned the 2003 Mensa Select. But TransAmerica takes the top spot on this list because it combines accolades with cultural relevance. Train games were nothing new, but TransAmerica streamlined train board game mechanisms. Something we’ll see with a future number one game.
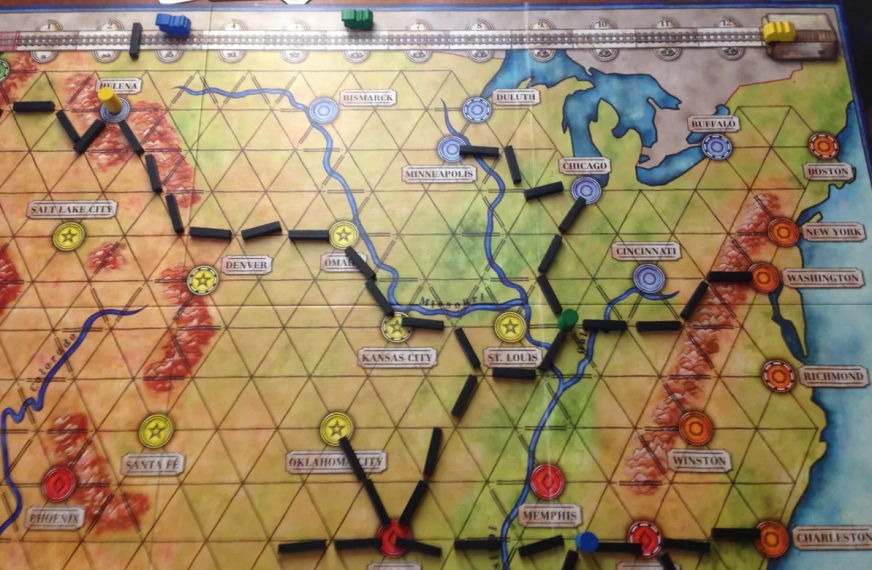
Each player has a set of five cities strung across the United States that need to be connected by rail. Players begin by placing their station on an intersection on the map, then take turns placing one or two rails each turn on the lines of the map. Initially, players can only be adjacent to their station or on a line that touches their station, but once one’s network connects with another player’s, one can place their rails anywhere along the combined network. I love how TransAmerica rewards players who know when to connect their networks with another player’s. Can you take advantage of others’ rails more than they can benefit from yours? TransAmerica boasts a short play time, perfect for players new to the hobby.
Did we get the list mostly correct? Let us know which games you’d add in the comments. Thank you for reading, and wherever you are, I hope you’re having a great day.
Hey, hey, Geekly Gang! Kyra Kyle here. The title of this post sounds sacrilegious. It can be difficult to believe someone who rates the Dorformantik Board Game above the video game that inspired it, to also rate some video games above their inspiring board/tabletop games. I love board games. But several video game adaptations work better than the original board games. There are various reasons why a board game or tabletop game may be better as a video game, and I’ll share why I prefer the digital version to the physical version of the game. I still play some of these board games in their original form, but all the games on this list make better video games than board games.
5) Ticket to Ride
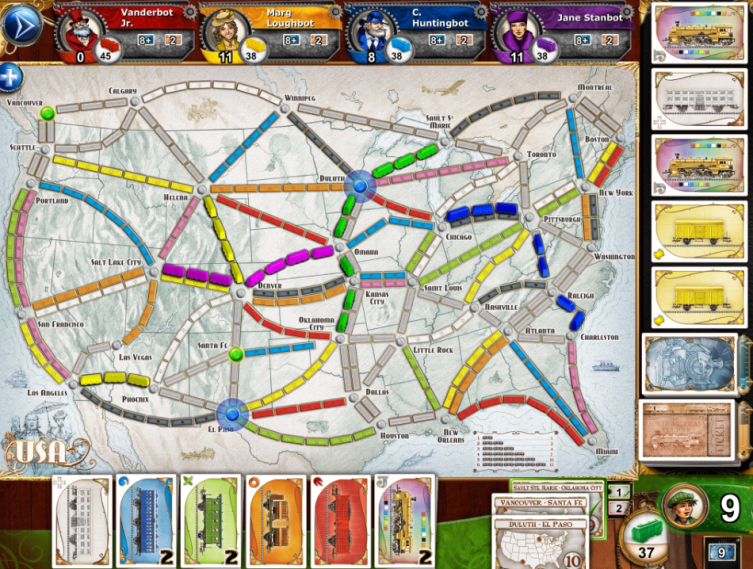
We begin with a game I play digitally and physically, Ticket to Ride. Asmosdee Digital does an excellent job translating Ticket to Ride to various online platforms. Since I have an iPad and an Android smartphone, I’m certain I’ve purchased Ticket to Ride for at least three or four of its possible platforms. Each version makes it easy to see what other players (typically AI players for me) have done on previous turns and plan future turns. Ticket to Ride’s tutorial is quick and easy, which makes sense: the game is quick and easy to learn.
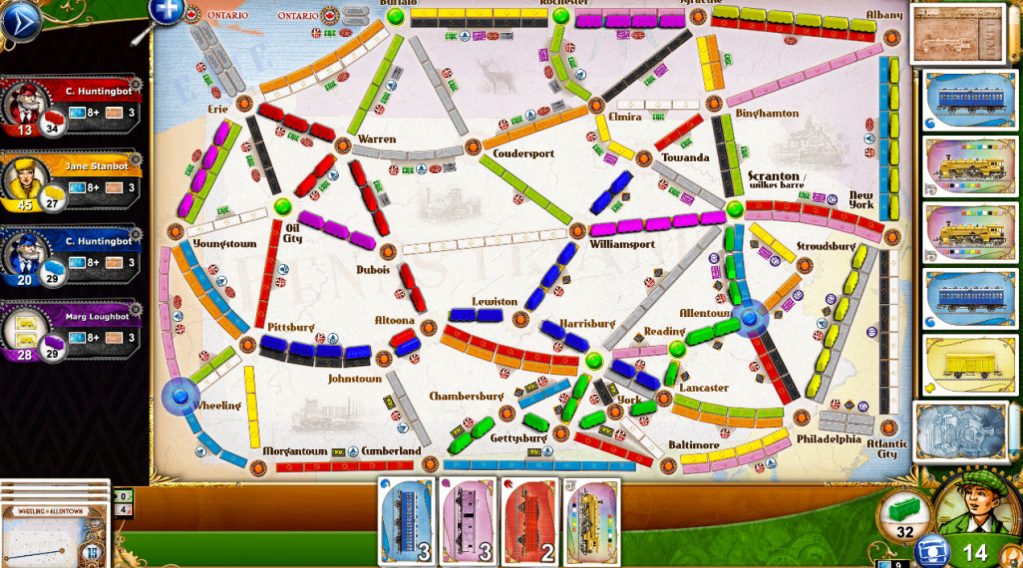
The reason why I play Ticket to Ride on digital more than my physical copies is my gaming group has moved passed this classic gateway game. I could litter this entire list with digital versions of some of my favorite, classic gateway games like Carcassonne and Ticket to Ride or even Smallworld (also from Asmodee Digital), but I like Ticket to Ride’s interface just a bit more and the extra maps add an extra layer of variability without needed to store dozens of bonus Ticket to Ride maps.
I like getting in a game or two of Ticket to Ride while I wait in line or I’m traveling. I highly recommend the digital Ticket to Ride.
4) Sentinels of the Multiverse
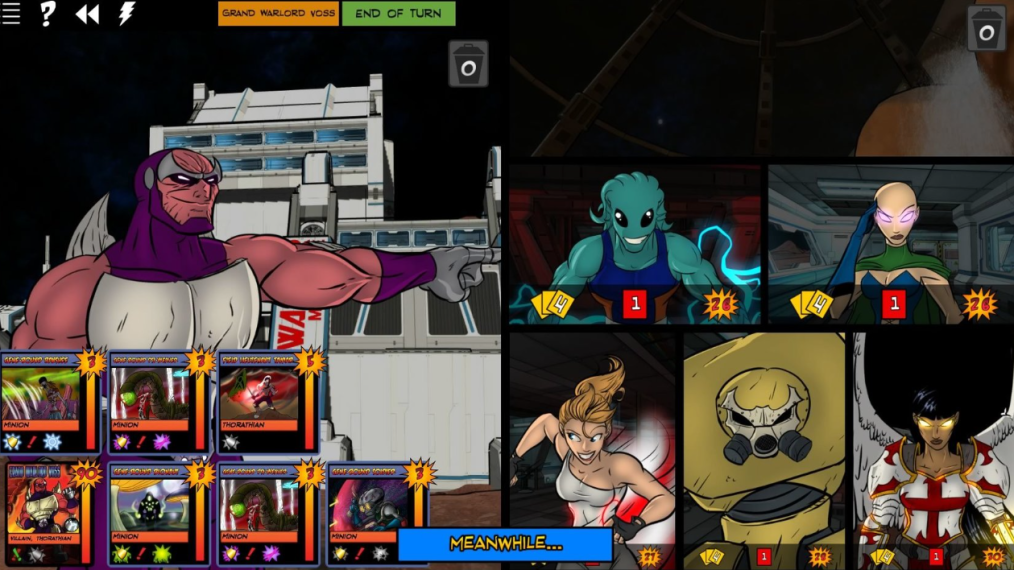
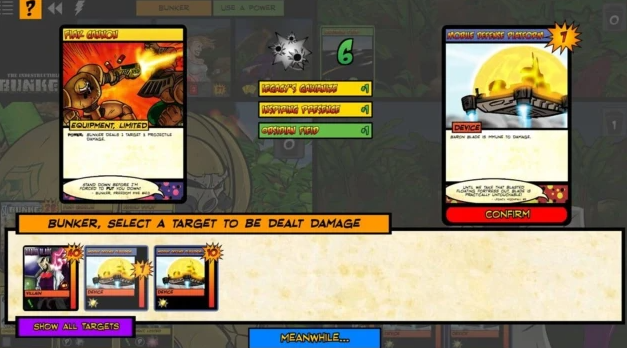
Sentinels of the Multiverse is another old favorite. Yes. Like Ticket to Ride, my gaming groups have moved past this board game to other games of its ilk, but there are more reasons why Sentinels of the Multiverse makes this list. The game takes a while to set up and take down (this reasoning will come up again), and Sentinels of the Multiverse has a lot of cards that trigger at various intervals and during different turns, which makes triggers easy to miss.
Sentinels of the Multiverse: The Video Game eliminates the need to remember triggers. The setup is nonexistent. Just load the game and go. While I may not own Sentinels of the Multiverse: The Video Game on as many platforms as Ticket to Ride, I’ve put in plenty of hours playing this digital version. I think the reason why I’m reluctant to purchase Sentinels of the Multiverse on other systems is that all content for the original Sentinels of the Multiverse is available in this video game. I don’t want to buy everything again.
Handlelabra does a great job converting the original Sentinels of the Multiverse into its digital version. Graphic effects match the original art, drawing me into the game. Sentinels of the Multiverse keeps the theme going with little touches like “Meanwhile…” whenever the game waits for input. Nice!
3) Neuroshima Hex
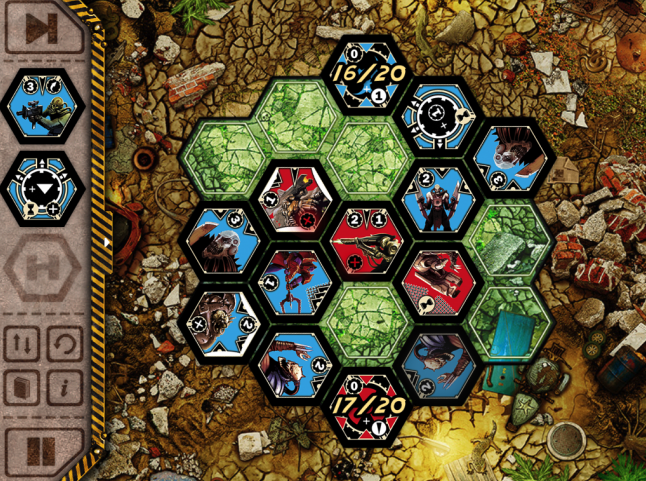
Neuroshima Hex is another game with plenty of triggers that are easy to miss, but unlike Sentinels of the Multiverse, the setup and take-down of this game are so laborious, I don’t dare play the physical copy. The only way I’ll play Neuroshima Hex’s physical form is if someone else agrees to handle the game’s logistics. And the timing aspect for Neuroshima Hex can get tedious. Sure, timing can be something one can easily miss, just like Sentinels‘ triggers, but Neuroshima Hex runs deeper than that. It hurts more in the physical game to overlook one of your opponent’s hexagonal pieces with a faster speed than yours and a devastating ability. In the digital copy, I snap my fingers and move on. In the physical game, I’m dejected.
Neuroshima Hex‘s strategic and tactical moves are fantastic, but there’s too much to remember in the physical copy. Neuroshima Hex’s digital copy provides reminders for gamers. Games don’t take nearly as long to play, so the time investment isn’t long. The same can’t be said of the physical version of Neuroshima Hex. I even like how the digital copy incorporates the game’s lore. While playing, it’s easy to overlook Neuroshima Hex’s post-apocalyptic world, and its colorful denizens.
Portal Games and Big Daddy’s Games did a great job translating Neuroshima Hex to a digital game. Similar to Ticket to Ride, I can see information easily and cleanly. Neuroshima Hex’s digital copy even has a free demo for you to try.
2) Gloomhaven
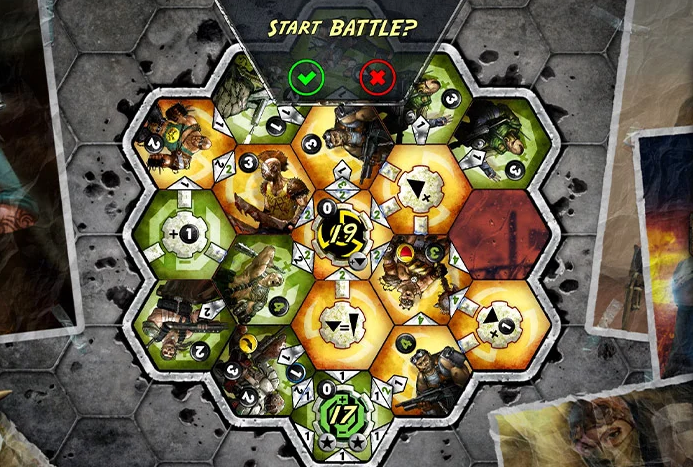
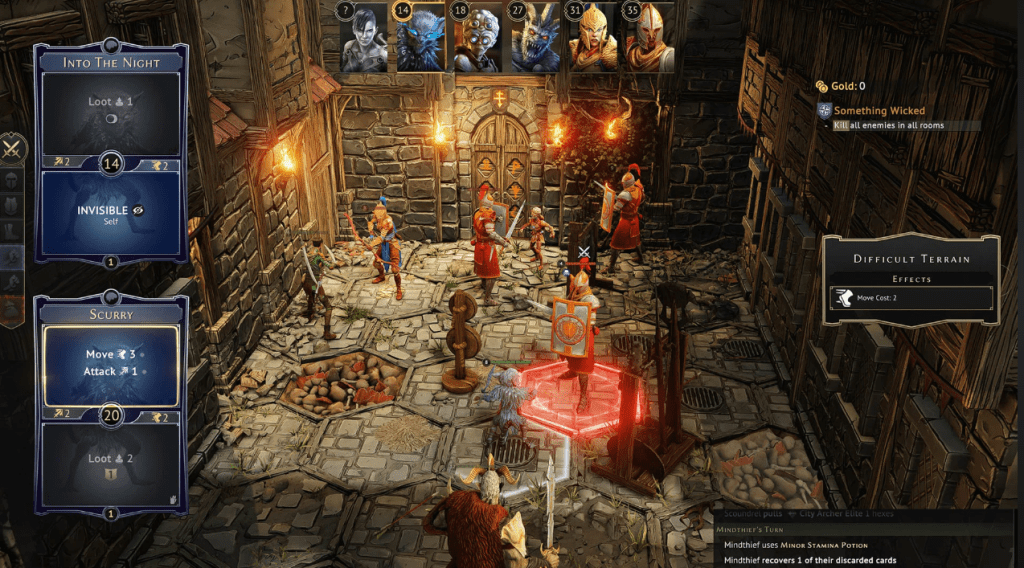
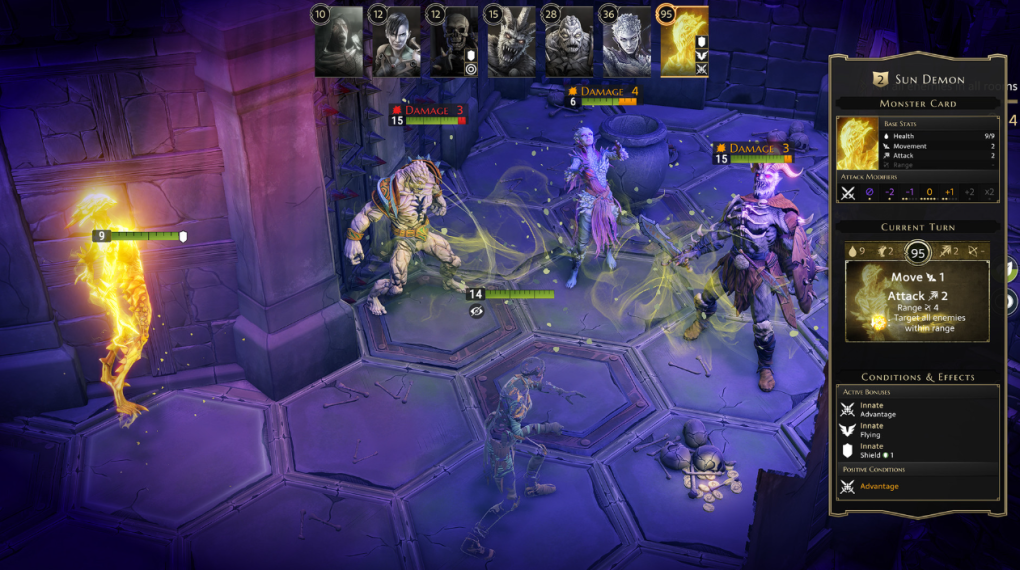
Gloomhaven’s digital copy makes it to this list for one reason: no setup. While other factors may have factored into other digital copies of board games making this list, Gloomhaven has an unbearable setup time. Fortunately, the Gloomhaven digital copy packs everything in the original’s massive box into its programming. You won’t need to save your character from one scenario of Gloomhaven to the next because this is a video game. The game does that for you. And Gloomhaven’s graphics are fantastic.
Like most other titles on this list, Gloomhaven has an easy-to-see and use interface. The physical game’s sometimes complicated rules are explained a little better in its digital version. I’m not saying that Gloomhaven’s rules are difficult to follow, but parts of the rules can be like Sentinels of the Multiverse and be easy to miss, and players won’t need to play out the artificial intelligence of the game’s enemies. Yes. A quarter to a third of Gloomhaven is acting out the game’s enemies. You won’t need to do that either in the digital version of Gloomhaven.
And did I mention Gloomhaven’s graphics? I did? Well, they look almost as good as Baldur’s Gate 3. Okay. Maybe that went too far, but Gloomhaven’s digital game looks amazing. You also won’t need to wait for your gaming group to meet up so you can continue your campaign. Gloomhaven: The Video Game offers the perfect alternative for this sprawling epic.
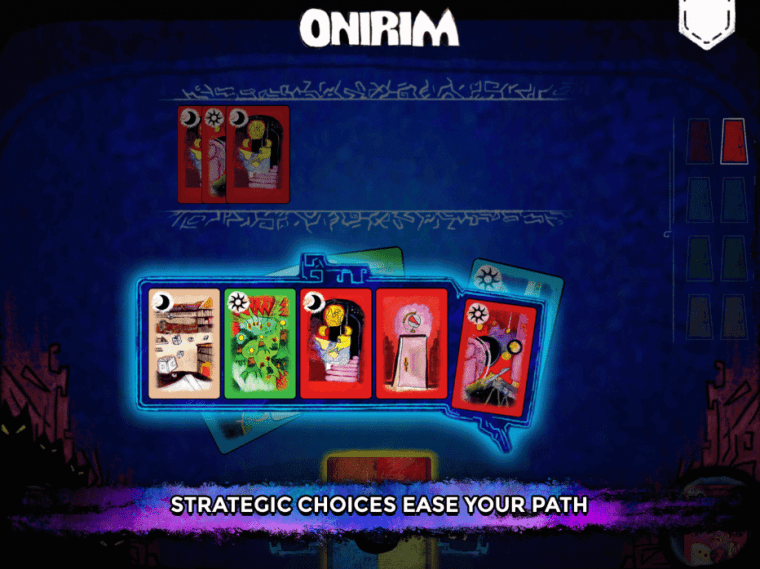
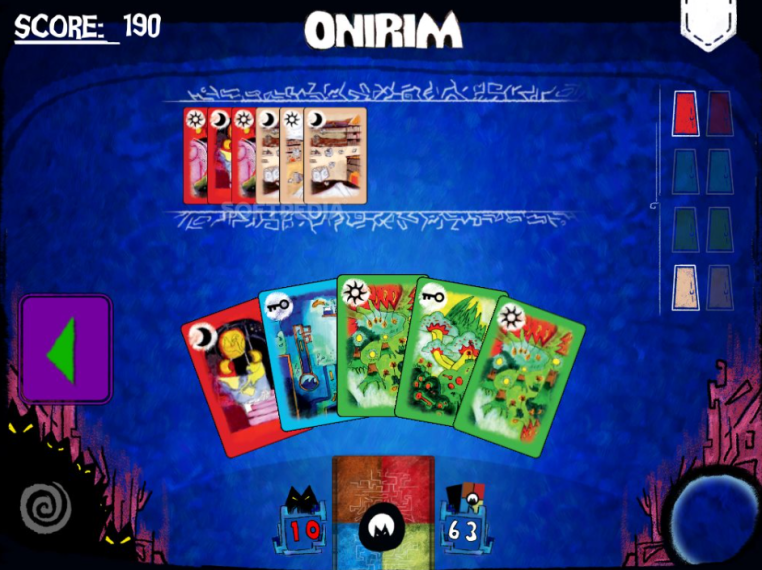
1) Onirim
Onirim will take the number one spot for some time to come. It would’ve taken this spot over a decade ago if we did a list like this. Onirim is the game I replace Solitaire with on all my smart devices. At its core, Onirim is a colorful, whimsical twist on classic Solitaire, but the physical game suffers for one reason: shuffling.
And I’m a compulsive shuffler. Seriously, I’m AuDHD (Autistic and an ADHDer) and shuffling cards is a stim for me, and I think there’s too much shuffling in the physical copy of Onirim. Some cards (Nightmares) discard cards from the deck, and if you draw more than one in a turn, you’ll need to shuffle them back into the deck. Other cards (keys) allow you to search the deck for a door, and if you find one, you’ll need to shuffle the deck again. And those are the base game cards. Onirim offers a couple of expansions with more cards that will force players to shuffle.
It may sound like I hate Onirim. Far from it. I love this game; it’s the only Solitaire game I’ll play on my smart devices. But Onirim has a ton of shuffling. You won’t feel that if you play Onirim’s digital copy. Trust me. Once you start playing Onirim, you won’t want to stop playing this dream of a Solitaire game.
That’s my list for now. What digital copies of board games do you like to play? Let us know in the comments. Thank you for reading, and wherever you are, I hope you’re having a great day.
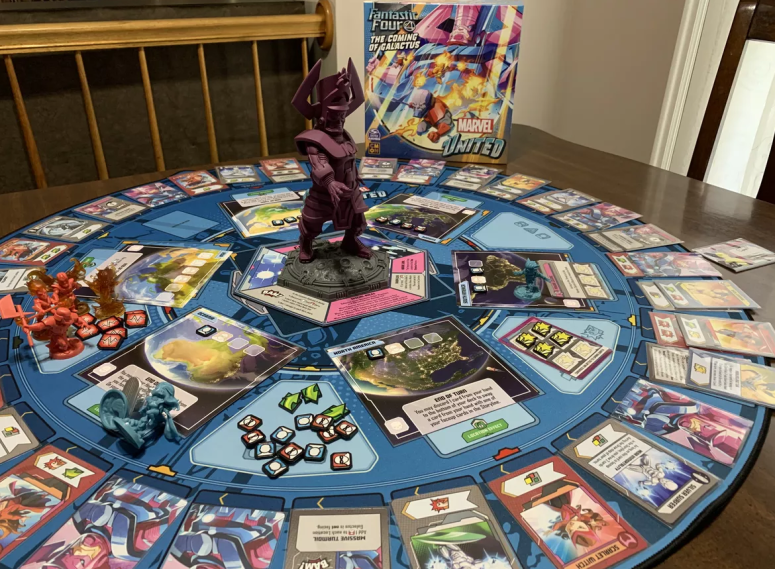
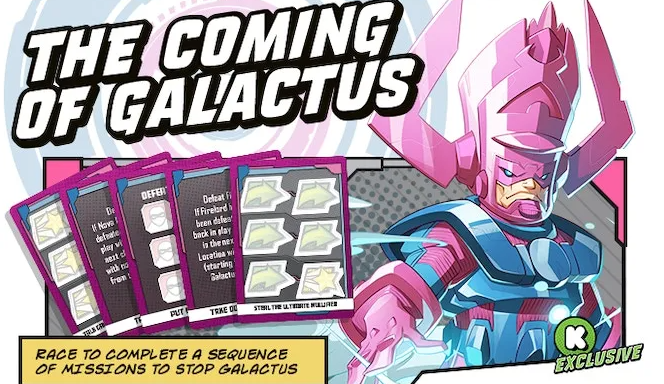
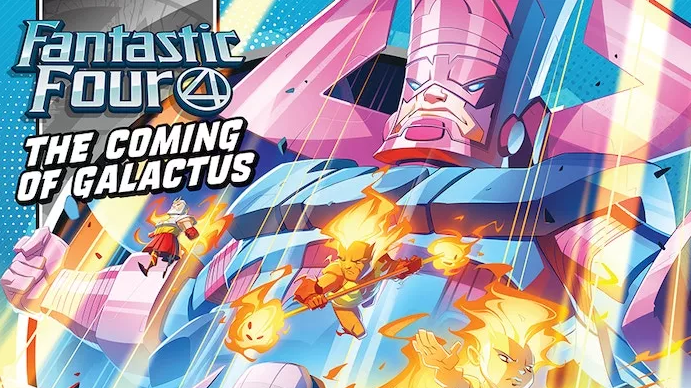
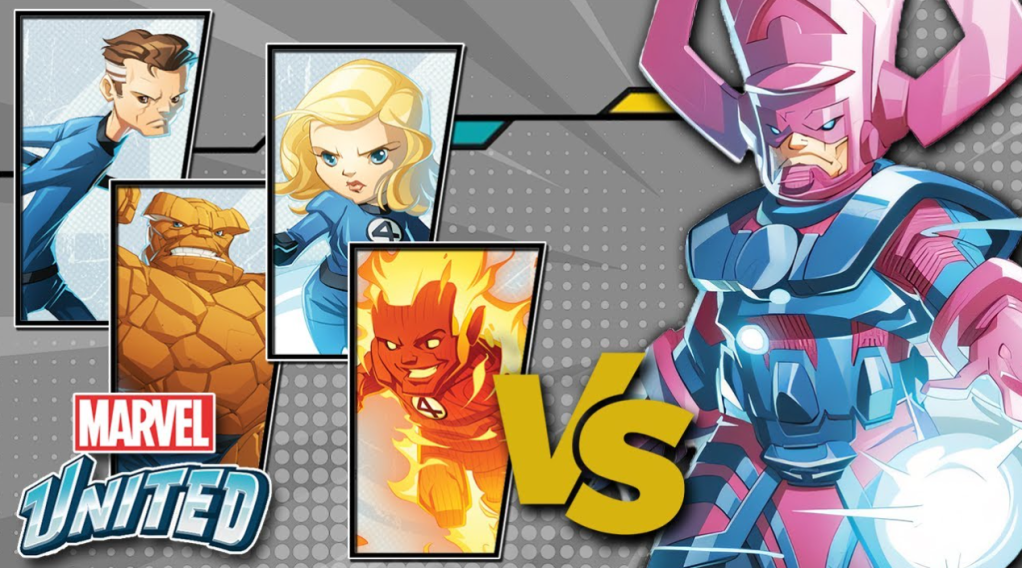
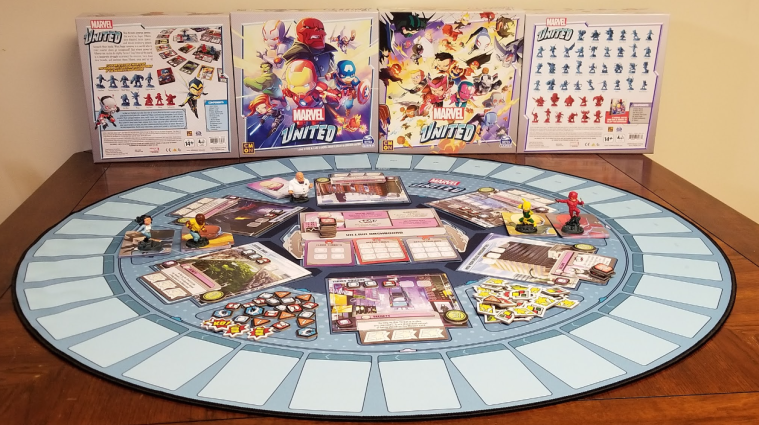
Marvel United: Fantastic Four – The Coming of Galactus was one of the main reasons I backed Marvel United Multiverse (the third wave of Marvel United), and it’s one of the better Marvel United expansions. It offers a ton of variable play options. With last summer’s Fantastic Four: First Steps featuring Galactus, I jumped the line of Marvel United reviews to cover this specific expansion from the third wave. I mean, it’s Galactus. He’s kind of a big deal.
We’ll get to Marvel’s planet-eater in a minute, but first, let’s take a look at Marvel United: Fantastic Four – The Coming of Galactus’s less cosmic details.
The Fiddly Bits
Designer: Andrea Chiarvesio and Eric M. Lang Publisher: CMON Global Limited and Spin Master Ltd. Date Released: 2024 Number of Players: 1-5 Age Range: 8 and up Setup Time: 5-10 minutes Play Time: 30-40 minutes
We already covered the Game Setup and Game Flow in our original Marvel United review (here’s a link to that review), so we’ll go over the basics in the following two sections. Let’s cover an abbreviated review of the game setup and rules.
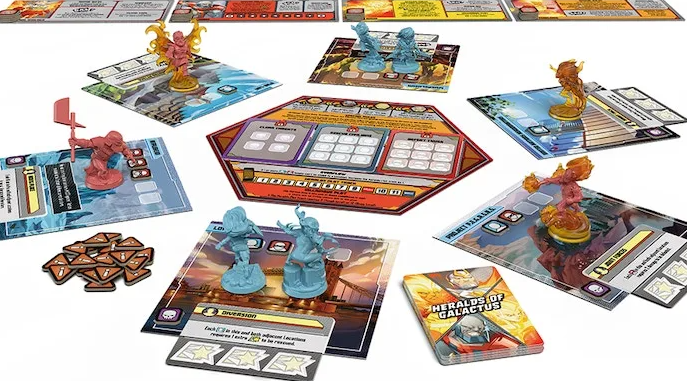
Marvel United: Fantastic Four – The Coming of Galactus’s setup can change depending on which Villain(s) and Heroes you choose to play. Each game consists of six locations. Unlike most other expansions, Marvel United: Fantastic Four – The Coming of Galactus includes six locations, but they’re built specifically for battling Galactus. If you choose to fight Galactus’s heralds one on one or as a group, you may want to pick six locations from a different box. You may choose your locations or shuffle them and choose six at random. Each Location card has spaces at the top for civilians and thugs, and a rectangle with a block of text that will state “End of Turn” at the top of the box.
Place civilian/thug tokens on their matching spaces. Shuffle the Villain’s Threat deck and deal out each Threat face-up so that it covers the rectangle at the bottom of each location. You must clear this threat before gaining the “End of Turn” effect printed on a Location. Place health tokens where signified on threat cards and on the Villain dashboard. Place the three mission cards (Defeat Thugs, Rescue Civilians, and Clear Threats) face up under the villain dashboard where the text reads “Unlocked.”
Each player shuffles their hero decks and then draws three cards to form their hands. Shuffle the Villain’s Master Plan deck. Leave the Master Plan deck face down. This will be the villain’s draw pile.
Players place their miniatures on one of the six location cards, usually the centralmost location for each player (easy access). Then, they place the villain on the location card opposing the heroes.
If one player chooses to play as the villain, hand the Super Villain cards to them, and the Heroes gain access to Super Hero cards. These new card times can be played if the game state triggers their use (for example, “You play a Master Plan card” or “Any Hero has 4 or more cards in their hand at the end of the Hero turn.” Timing is key.
Special Galactus Setup Rules
Follow the rules on the back of Galactus’s hexagon-shaped dashboard to build the Stop Galactus Missions deck. “Convince Galactus to Spare Earth” will always be the bottom card. And then reveal the top Mission.
Shuffle the Master Plan deck and remove 6 random cards from the game.
Heroes start in the Location corresponding to the continent where they are playing.
Set aside the 2 New Herald Threat cards, placing the others as usual.
Place Galactus on the back of his dashboard in the middle of the 6 Locations, facing the Heroes’ starting Location.
Split the printed action tokens among the players in any fashion.
Heralds of Galactus Setup Rules
Place the 4 Heralds’ Villain (individual) Dashboards nearby the group’s dashboard, each with Health depending on the number of players.
Randomly place the 4 Herald tokens faceup, each in a different slot on the Herald Group Dashboard.
The Heroes start the game in any 2 opposite Locations (splitting as they wish). Then, randomly place 1 Herald in each other Location.
Create a Crisis token pool within reach of the players. The number of Crisis tokens will be dictated by how difficult the players want the game. Players will then split a total of 2 wild action tokens, however they see fit.
Game Flow
The villain(s) play first. Draw the top card of their master plan deck. The villain moves the number of spaces indicated. Resolve any BAM! Effects and these effects will be printed on a space within the villain’s dashboard. Then, place the civilian/thug tokens (if any) indicated at the bottom of the card. If a player has taken the role of the villain, they get a hand of cards and can choose which card they play. The heroes get their turn after all the villain’s effects are resolved.
Heroes pick which player goes first, and hero turns will continue around the table clockwise. At the beginning of each game, Heroes will get three turns before the villain receives another turn. During their turn, heroes play one card from their hand.
Resolve actions and the symbols printed at the bottom of the hero’s card in any order. The symbols at the bottom of a hero’s card will be shared with the next player, but any printed action will not be shared. Heroes will use these actions to complete missions. The game begins with three missions in play: Defeat Thugs, Rescue Civilians, and Clear Threats. Each mission card will have spaces for the tokens they require to complete. As soon as these spaces are filled, the card is discarded, and the mission is considered complete. Mission cards can be completed in any order.
After the heroes complete the first mission, the villain panics and will act (play a card) every two hero cards instead of every three hero cards. After the heroes complete the second mission, the villain becomes vulnerable to damage. The heroes can complete the third mission, but it isn’t necessary. If the heroes do complete the third mission, each hero immediately draws 1 card, increasing each player’s hand size by one.
Play continues back and forth until either the villain wins (by completing their unique master plan or anyone, heroes or villains, runs out of cards) or the heroes win by dealing enough damage to the villain after the villain becomes vulnerable to damage.
Review
Like its predecessor, Marvel United: Fantastic Four, Marvel United: Fantastic Four – The Coming of Galactus lives up to the hype. I seriously considered not backing any part of Marvel United Multiverse, but a few highlights from the stretch goals, a couple of other expansions, and, first and foremost, The Coming of Galactus, made Marvel United’s third wave fun and exciting.
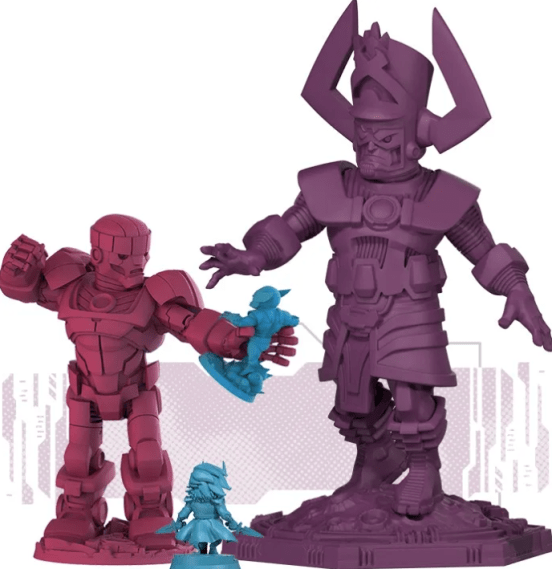
Let’s begin with the big man himself. Galactus’s scale is intimidating and thematic. Despite multiple Sentinels in the X-Men (second wave of Marvel United), Galactus is by far the largest miniature for the game. He should be. At first, when I heard that Galactus would begin the game on the same space as the Heroes, and the Heroes begin the game on the continent where the gamers are playing, I rolled my eyes. That’s silly. But watching the big purple guy staring at my home continent when the game began made it more real. It’s weird. It was creepy, bizarre, thematic, and loads of fun.
Galactus never becomes Under Pressure, so Heroes don’t need to worry about speeding up Galactus’s clock, but Galactus cannot be damaged. You’re not defeating Galactus. You’re convincing him not to devour Earth. To do that, you need to complete nine—that’s nine—missions instead of the usual two, plus dealing damage to the main villain. This makes the lack of speeding up Galactus’s clock moot. You’ll need every card and round you can to tackle his hunger.
The Missions vary with each element Marvel United offers: Heroics, Movement, Damage, Rescuing Civilians, Defeating Thugs and Henchmen. You’ll need a well-balanced group of Heroes to consider taking on Galactus. Fortunately, the Fantastic Four fit that bill, and they’re the classic Galactus opponent.
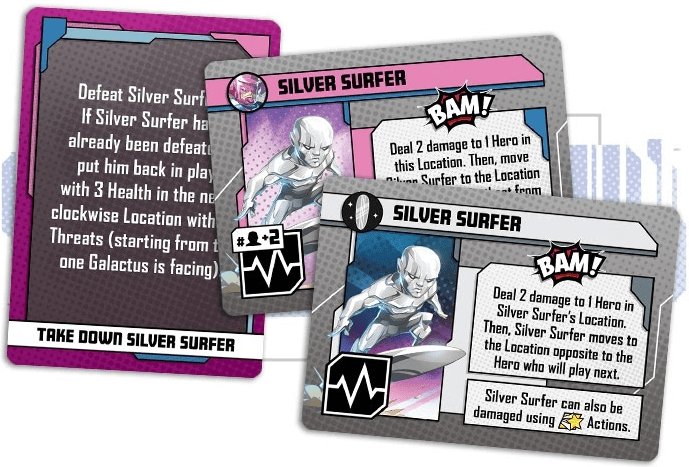
I like how Marvel United: Fantastic Four – The Coming of Galactus includes a Silver Surfer Herald Threat Card, so you can use Silver Surfer as one of Galactus’s heralds. That’s awesome and a great touch. Galactus adds a heap of Civilians and Thugs to the board each one of his turns; he adds one or the other to each Location he’s not facing. This applies plenty of pressure. At first, I wondered why the Heroes were given six action tokens to split among themselves. Yeah, you’ll need every last one to defeat Galactus. The few Master Plan cards that don’t add copious tokens shake up the game by bringing back defeated threats of a certain type or adding brand new Heralds. Yay!
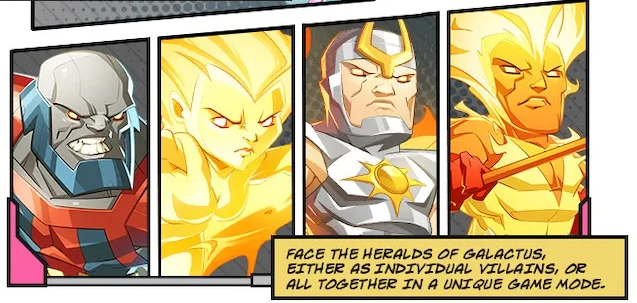
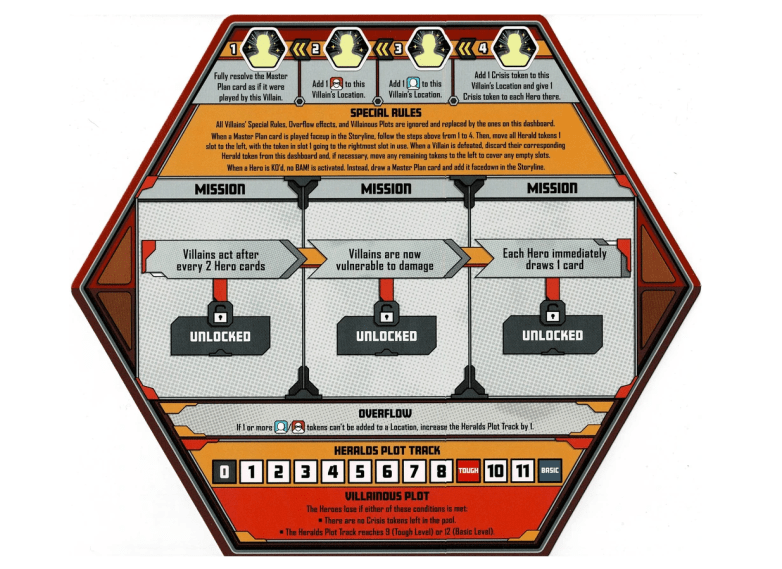
I could go on about Galactus for another 400 words or so. He alone makes The Coming of Galactus worth it as an expansion, but this expansion ups the ante of variable playstyles. You can battle the Heralds of Galactus without including the big man himself. What? Marvel United adds an extra dash of spice anytime it includes a villain team. The Heralds of Galactus are no different. The Herald tokens dictate which villain does what during the villain’s turn. The first spot is the Villain who acts as if they played the Master Plan card for the turn. The other three Heralds add tokens: a Thug, a Civilian, and a Crisis Token. Players lose if they gain too many Crisis tokens, so you’re already at a huge disadvantage.
I love how Marvel United’s game system allows for simple but elegant solutions to potential problems. It could be boring if the Heralds did the same things each turn, but the Herald tokens shift positions after each Villain turn, so each Herald will have a chance to perform the four actions.
I’ll be honest. I haven’t played nearly as many games of Heralds of Galactus as I have The Coming of Galactus—for obvious reasons—but don’t sleep on this game mode. The Heralds of Galactus team adds a heap of extra value to The Coming of Galactus expansion.
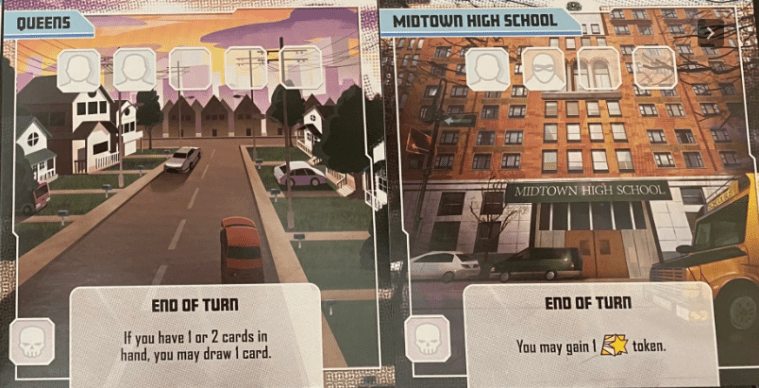
Before we get into the individual Heralds as solo villains, let’s take a quick look at the six unique Locations and the lone hero in The Coming of Galactus. I’ll start with the western hemisphere and work my way east. Each one of these continent Locations has a ridiculous “End of Turn” ability. I advise only playing with these Locations if you intend to take on Galactus, his Heralds as a team, or another crazy strong opponent. But the choice is yours. Ultimately, you do you. Just know these abilities are crazy strong.
We begin with North America, and this Location may have the tamest ability of the six. North America allows you to swap a card from your hand with one of your faceup cards in the Storyline. This is good, but other Locations and character abilities have done something similar in the past. South America allows you to discard a card, gain 1 Wild token, and Action tokens equal to the symbols of the card you discarded. Now we’re talking.
Europe allows you to draw a new hand. Simple but great. Africa’s ability to discard a card to the bottom of your deck to defeat 1 Thug and rescue 1 Civilian anywhere is one of the best ways to prevent overflow, a common issue. Asia adds multiple Thugs and/or Civilians to itself, but Asia can house a game-high six tokens. Yikes! Sometimes you need extra Tokens to accomplish goals. And Oceania may have the single most broken ability. You may KO your Hero to remove them from the game (discarding any Action tokens you have) and choose a different Hero. What? Oceania may be the only way you can keep a game with Galactus going. Oh, I’m almost out of cards. KO. New hero. Talk about an insane power.
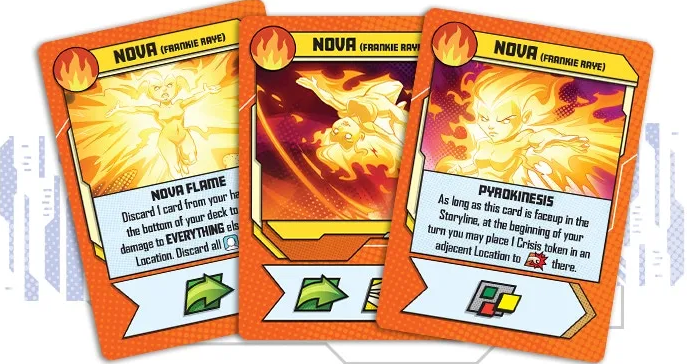
Nova (Frankie Raye), one of Galactus’s Heralds, can also be played as a hero. She offers a bunch of move, a large amount of damage, and little Heroics. Her special abilities can be great in certain situations. “Nova Flame” deals one damage to Everything at her Location, while also discarding (not rescuing) Civilians. This is a good way to clear a Location. But her starting card “Pyrokinesis” begs to be played first. As long as “Pyrokinesis” is faceup in the Storyline, at the beginning of your turn, you may place 1 Crisis token in an adjacent Location to deal an extra damage there. If the villain(s) you’re facing don’t use Crisis tokens, no problem. If they do use Crisis tokens, you could be in trouble.
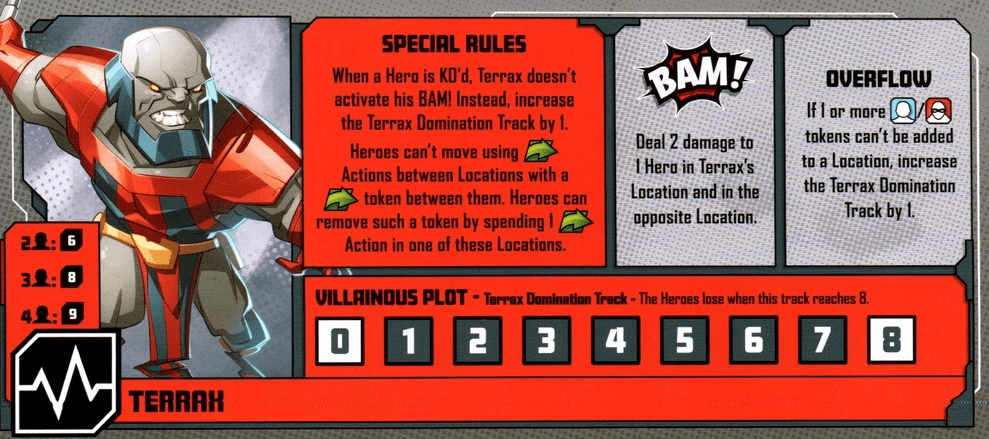
The Coming of Galactus features two new major shakeups to gameplay: Galactus and his Heralds as a team. But the Heralds can be played as solo villains, and there are some more interesting gameplay mechanisms to be found with each. Terrax takes an interesting approach to a progression track. His gameplay centers around causing numerous overflows, and he can even slow down by adding Movement tokens in between Locations. Air-Walker wins by adding Crisis tokens to Heroes. He can be annoying because each one of his Threats allows him to move away from Heroes, making extra Movement a necessity. And Nova wins by adding Crisis tokens to each Location. She does this in multiple ways; however, she may deal the most damage to Heroes by causing damage if a Hero lands in a Location with a Crisis token. Uh oh!
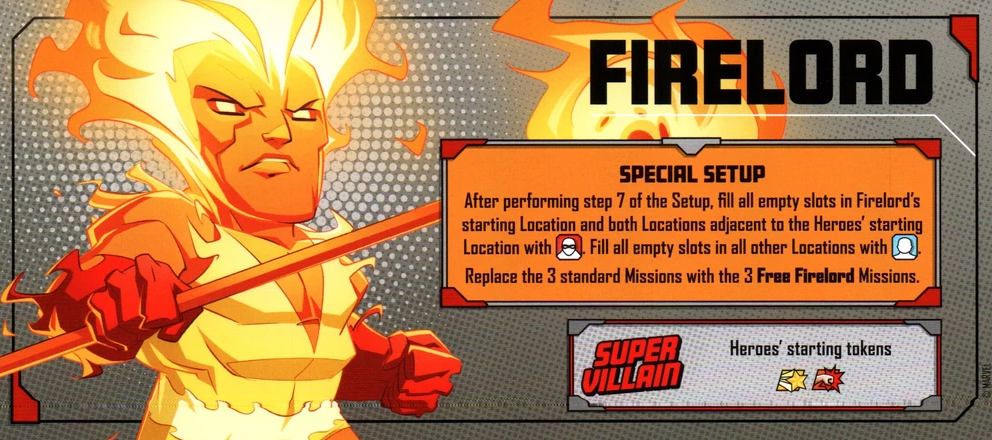
But Firelord is the most interesting of all the Heralds as villains. The Heroes are trying to rescue Firelord. Like Galactus, Firelord can’t receive damage. In specific cases, Firelord’s BAM ability can actually help the heroes, furthering the idea that Firelord doesn’t want to harm humanity. This is a nice touch. As you can see, The Coming of Galactus offers a bunch of replay value to Marvel United in a relatively small box. Honestly, the box is that big to accommodate the Galactus mini. That box’s size is a hundred percent the big purple guy.
Too Long; Didn’t Read
As of the writing of the review, Marvel United: Fantastic Four – The Coming of Galactus replaced Marvel United: Fantastic Four as the highest-rated Marvel United expansion on BoardGameGeek and for good reason. This expansion adds more game modes than any other single expansion of Marvel United. And Galactus is terrifying and hoot to play against.
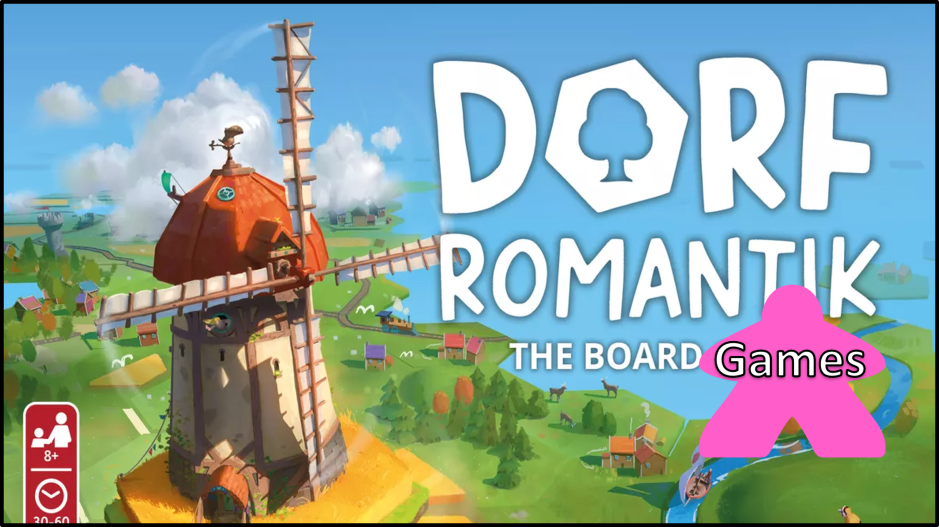
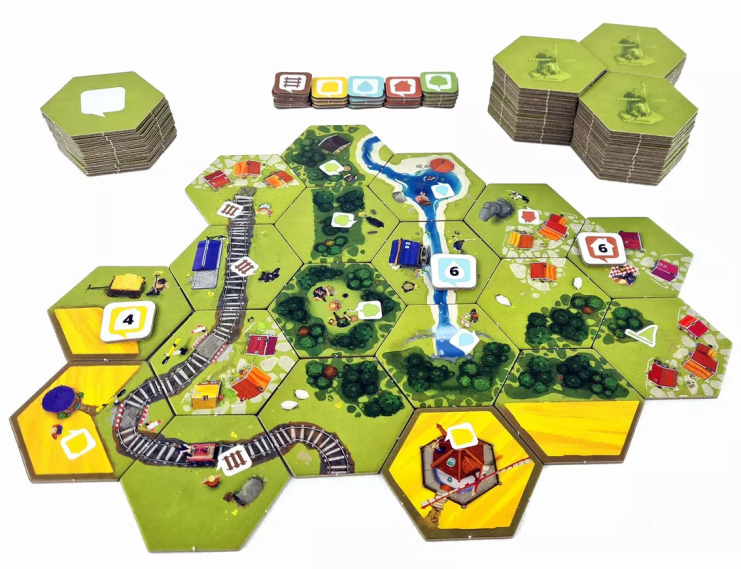
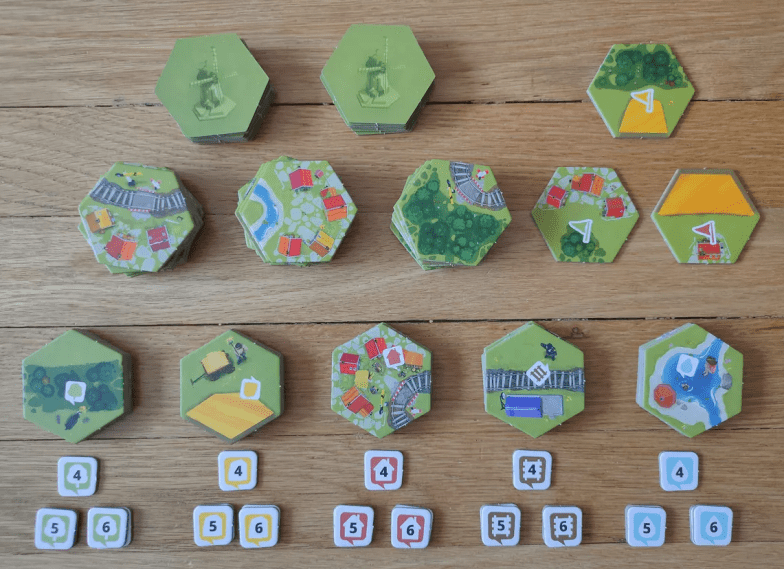
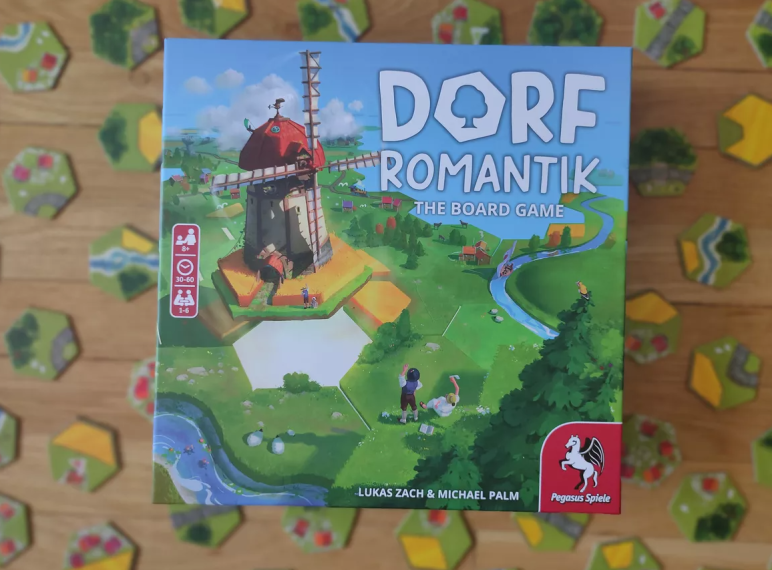
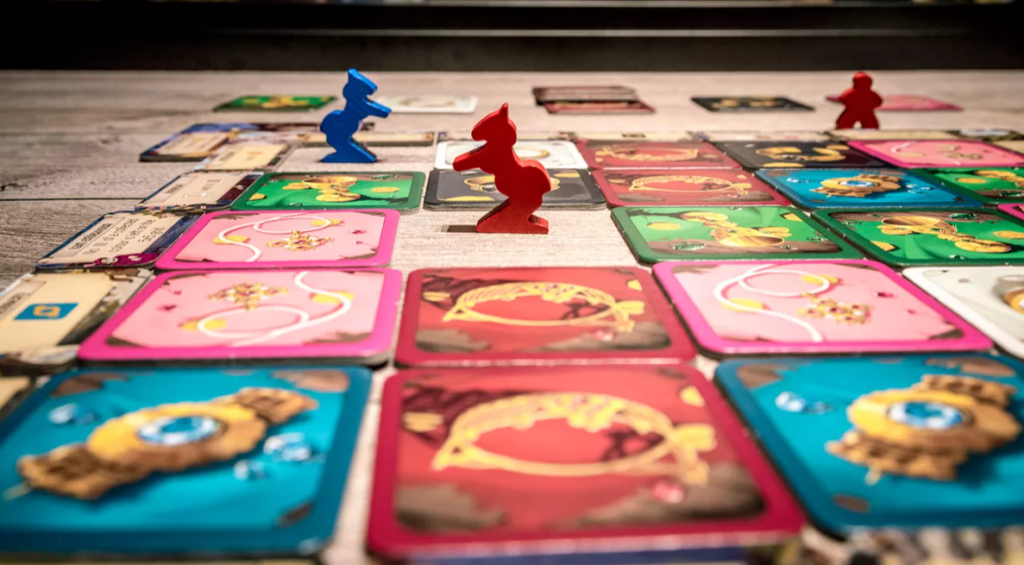
Dorfromantik: The Board Game is the rare exception where a video game (that was inspired by board games) made it big, so then a board game version of the video game is made, and that board game becomes an award darling. Hey, hey, Geekly Gang! Kyra Kyle here. Today’s board game review is for Dorfromantik: The Board Game. We covered the original Dorfromantik video game a few months ago (just in time for Christmas), so it’s only fair to review Dorfromantik: The Board Game. We’ll get to the game in a bit, but first, we’ll review Dorfromantik: The Board Game’s credits.
The Fiddly Bits
Designer: Michael Palm and Lukas Zach Publisher: Berry Games; Pegasus Spiele Date Released: 2022 Number of Players: 1-6 Age Range: 6 and up Setup Time: 5-10 minutes Play Time: 30-60 minutes
Game Mechanisms
Area Majority Campaign Cooperative Game Hexagon Grid Modular Board Tile Placement Variable Set-Up
Game Setup
While Dorfromantik: The Board Game offers concise rules, BoardGameGeek user lenlindsay made a Dorfromantik: The Board Game full rules on 1 page, where they did the work we typically do here and paraphrased the rulebook to give you a glimpse of Dorfromantik. Thank you, lenlindsay.
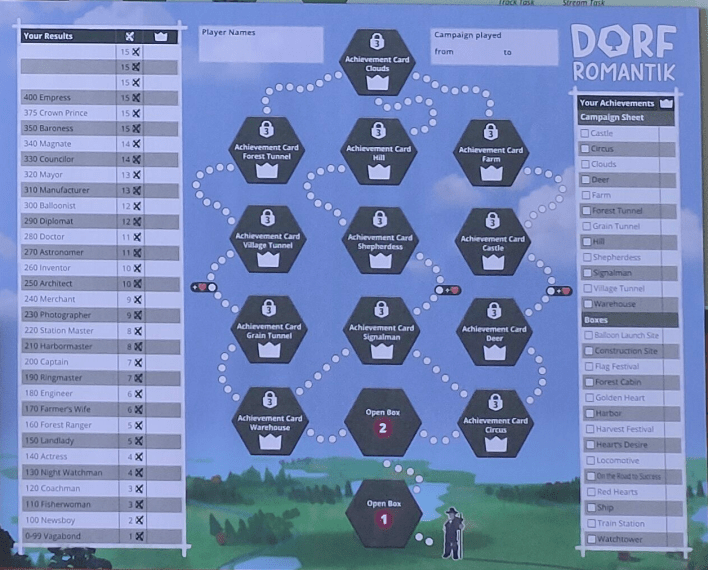
1) If playing a campaign game, check-off on the Score Sheet all the components you have unlocked (to remind you that these will be scored at the game’s end).
2) Shuffle and place the Landscape Tiles, Task Tiles, and Task Markers (separated by color) in facedown stacks on the table in easy reach of players.
3) Put 3 Landscape Tiles back into the box (they won’t be used)
–In a campaign, do not mix in Special Tiles till removing 3.
4) Do NOT open any of the boxes until told to do so.
Game Flow
1) Choose a starting player. Then take turns clockwise.
2) One at a time, take 3 Task Tiles with a matching Task Marker and place them adjacent to each other on the table however seems best to your group. (Players take turns doing this.)
3) On their turn a player checks to see if there still are 3 tasks on the playing board. –If not, they take a Task Tile and a matching Task Marker and decide where to place it on the board. –Otherwise take a Landscape Tile and place it on the board.
General Placement Rules
1) Tiles must be placed adjacent to at least one tile on the board.
2) Train tracks and streams must match on the adjacent tile.
3) Other terrain types need not match (but there are advantages to matching areas of the same terrain type).
Game End
* The game ends immediately when there are no further Landscape Tiles left to place.
* If you place the last Landscape Tile so that it completes a task(s), you may place a new Task Tile(s) until there are again 3 available tasks on the board (at which point the game ends).
We won’t go into detail the endgame scoring rules. Dorfromantik: The Board Game (and lenlindsay) does a great job of explaining this. Dorfromantik: The Board Game is also cooperative, so scoring knowing how to score isn’t cutthroat, but knowing how to score in the game will inform where you’ll place your tiles. We only wanted to share how to play and what you’re doing during a turn.
Review
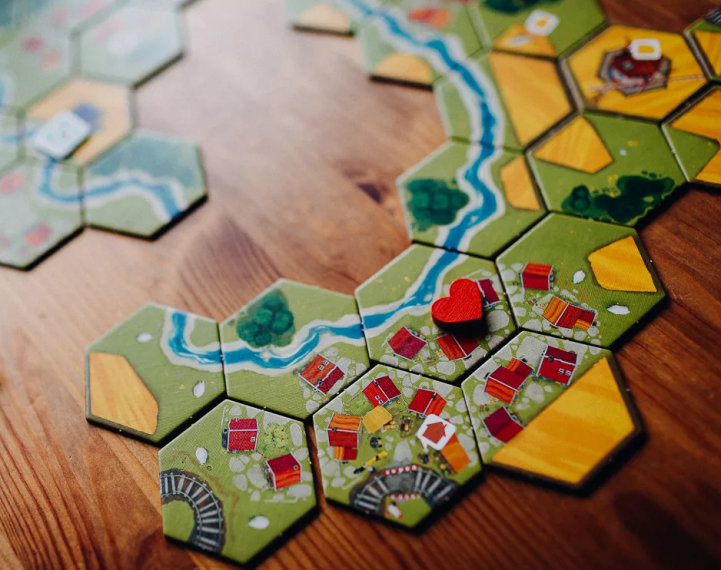
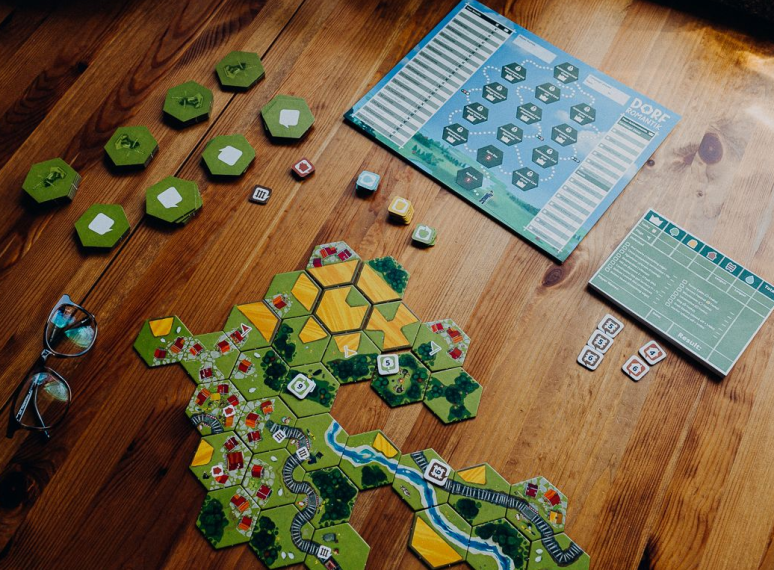
At first, Dorfromantik: The Board Game plays like a group activity rather than a game. I noticed this when I was first playing Dorfromantik and when I taught Dorfromantik to other new players. But as soon as I busted out the endgame scoring and applied our results to Dorfromantik’s campaign sheet perception of the game flipped.
Dorfromantik: The Board Game may be the first board game I’ve played where the campaign makes the game. Don’t get me wrong, the group activity that is Dorfromantik without the campaign is a lot of fun. Dorfromantik: The Board Game may be the first cozy board game I’ve covered. That sets it apart. I haven’t found too many games where I can board game and chill.
The only tension you’ll find with Dorfromantik: The Board Game is by adding the campaign. Fortunately, the game includes a massive pad of campaign sheets, so one copy of Dorfromantik can accommodate multiple gaming groups. Believe me, I’ve played Dorfromantik with multiple gaming groups. Each time, it’s the same. We’re chilling, making the best city we can from the tiles we draw, and then the endgame scoring occurs. We watch as the score climbs higher and higher. The more points we earn, the more of the campaign track we can unlock. That’s Dorfromantik’s challenge.
After a path or two, your gaming group will unlock one of Dorfromantik’s campaign boxes with new rules and tiles. The campaign will eventually branch, and you can then choose the path you want to take. Each of these paths will include different boxes, rules, and scoring conditions. The campaign’s branching path gives Dorformantik’s its replay factor. And I’ve played a lot of this 2023 Spiel des Jahres (German Game of the Year) winner.
Dorfromantik: The Board Game won’t be for everyone. In fact, I see it as an excellent gateway game (a game for people new to the board game hobby). Dorfromantik includes numerous game mechanisms you may find in competitive games, but since it’s a cooperative game, and a super chill cooperative game at that, Dorfromantik acts like a soft pat on the back for newcomers.
Too Long; Didn’t Read
Dorfromantik: The Board Game is an excellent gateway game (a game for people new to the hobby) because it’s a super chill cooperative game. This game’s campaign is stellar; without the campaign, Dorfromantik plays more like a group activity.
Hey, hey, Geekly Gang! Kyra Kyle here with another Top 5 Tabletop Game List throughout the years. Today, we’ve reached the current millennium for tabletop games. The 90s shook up what it meant to be a modern board game; the first decade of the 2000s will give us numerous evergreen titles that dominate the board game landscape today. We should see plenty of familiar designers and familiar titles in these upcoming lists. We’ll get to the games in a bit, but first, let’s review our list’s criteria.
1: Cultural relevance plays as much of a factor as overall quality. A game might make a list that doesn’t hold up to others of its type, but you must admit the game is everywhere.
2: Only one game from a franchise makes the list. This will become more of an issue the closer we get to games with expansions.
3: Longevity plays a role, too. A game doesn’t have to fly off the shelves today, but it had to have some widespread appeal for a decent time.
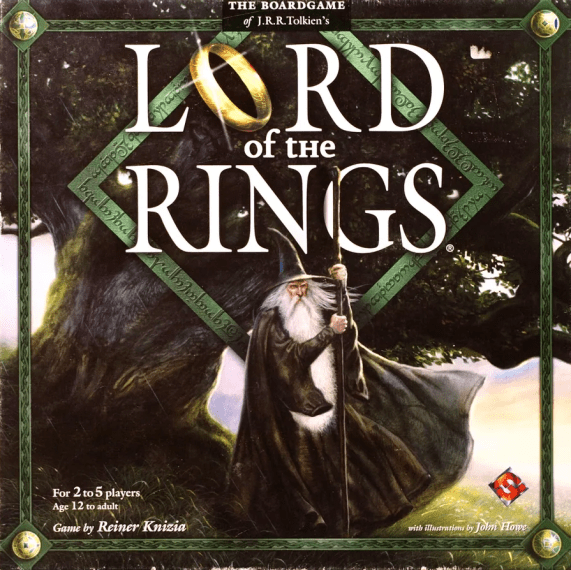
5: Lord of the Rings (2000)
Yes! Yet another Reiner Knizia title makes one of these lists. 2000’s Lord of the Rings is still a lot of people’s go-to board game that uses the Lord of the Rings intellectual property. It’s also one of Knizia’s few cooperative board games and may have inspired a cooperative board game boom that we’ll see in a handful of years.
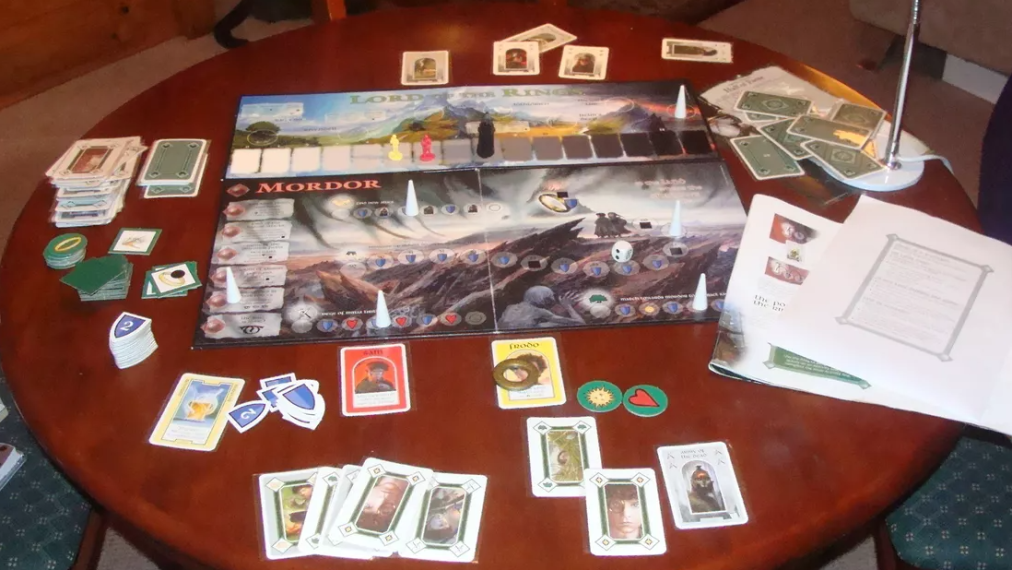
Lord of the Rings follows the events of the novels to a T, which is why some gamers still consider this board game to be the definitive Lord of the Rings board game experience. And it runs fast. Gameplay is centered on advancing through a series of scenarios (that mirror the books). Players turn tiles and play cards to move forward and collect and spend tokens to avoid advancing the Dark Lord Sauron. In dire situations, tokens may be spent to call Gandalf for assistance, or the One Ring may be used to advance toward Sauron. The push-pull is thematic and tense. It’s no wonder Lord of the Rings received a Spiel des Jahres special award.
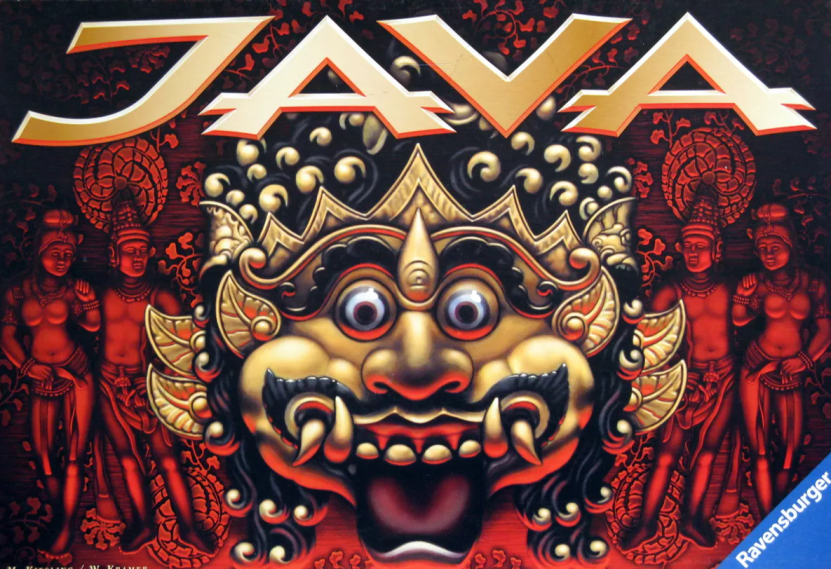
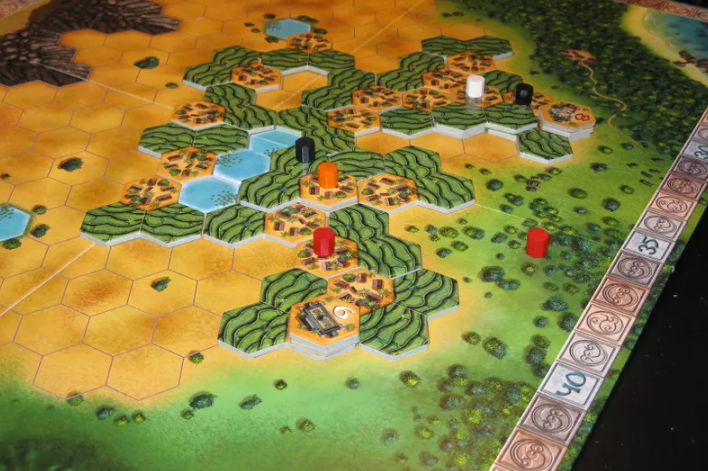
4: Java (2000)
I could’ve gone with Torres, another Wolfgang Kramer and Michael Kiesling collaborative design that won this year’s Spiel des Jahres (German game of the year), but I decided to go with the next game in Kramer and Kiesling’s Mask Series, Java. Tikal made the 1999 list. Java tends to be the forgotten game in the Mask Trilogy of board games, and I don’t know why. I love Java’s exploration.
Players take turns building the titular island, scoring victory points by setting up palace festivals at the right moment. Java ends when the players run out of tiles. It’s a simple premise, but Java’s rules may be unforgiving for novice players. Still, Java is a great addition to the Mask Trilogy.
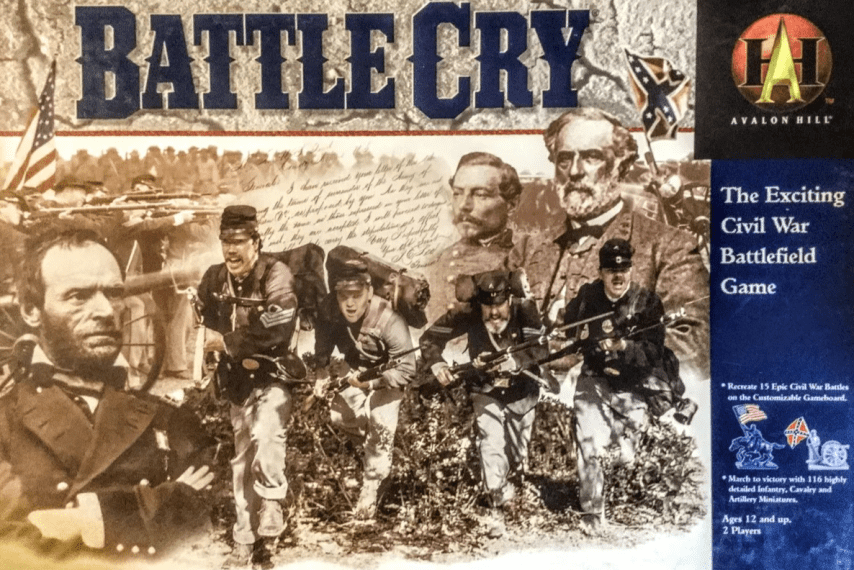
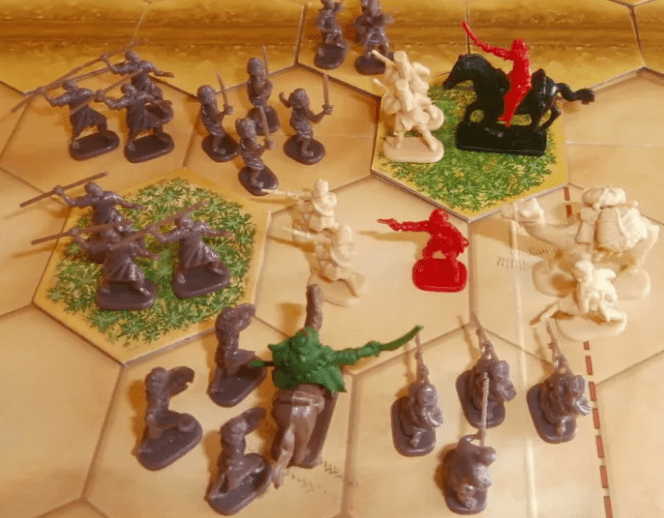
3: Battle Cry (2000)
Wargame purists may disagree, but Battle Cry revolutionized wargames. Richard Borg (we’ll see his name again on one of these lists) took elements of wargames, combined them with miniatures, and simplified the rules, and came up with the war game powerhouse that is Battle Cry.
Borg would continue to perfect his system of card and dice combat with future wargame installments, but Battle Cry, set in the American Civil War, marked the first use of this system. Players command a variety of units: infantry, cavalry, and artillery. Scenarios dictate how many of each unit a player (one playing the Union and the other playing the Confederacy) will control. For each opponent’s unit removed from the board, a player receives one victory point. The player who scores the required number of victory points first (determined by the scenario instructions) is the winner. Battle Cry and its spiritual successors continue to divide gamers. Wargame purists, as I mentioned before, may consider Battle Cry too simplistic, but this simplicity makes Battle Cry more accessible.
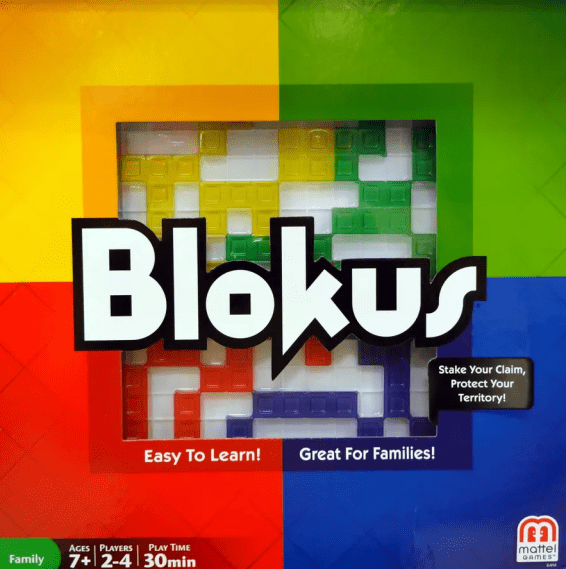
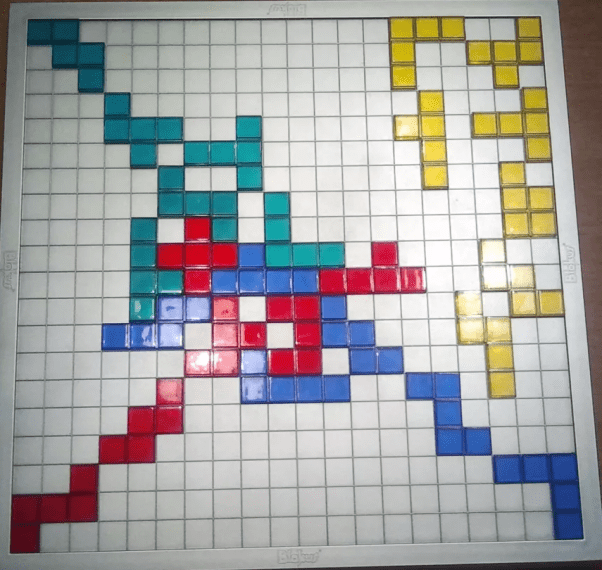
2: Blokus (2000)
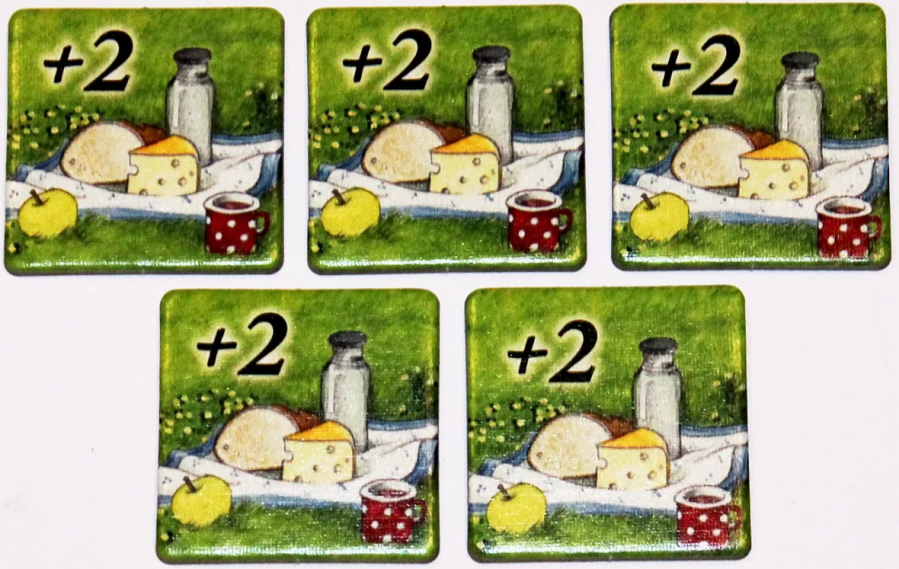
In Blokus, players score points by occupying the board with Tetris-style pieces(named polyominoes because they’re dominoes of irregular shape) in their color. Even today, Blokus is visually arresting. It earned numerous awards, including the Mensa Select award and the 2004 Teacher’s Choice Award. There’s no denying that Blokus has staying power.
But the reason Blokus is this high on our list is because of its use of polyominoes. While it took a decade or more to catch on, polyominoes have soared in popularity. Patchwork, Barenpark, Isle of Cats, A Feast for Odin, Planet Unknown, and many other board games that use polyominoes owe Blokus a debt of gratitude. Thank you, Blokus, for introducing this amazing board game component.
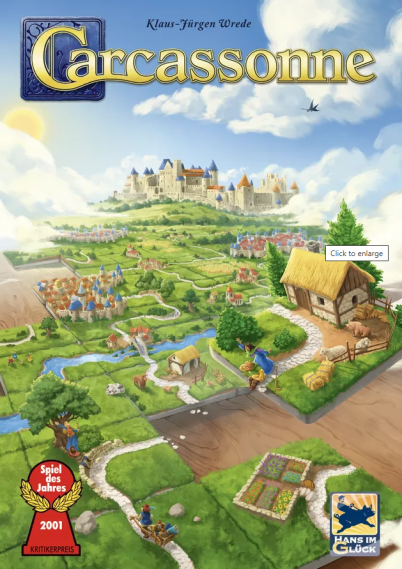
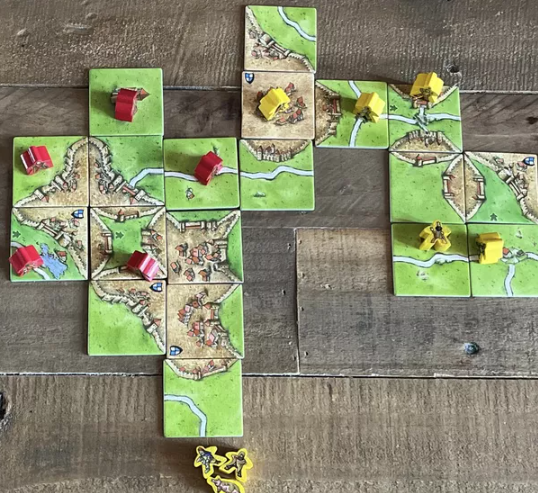
1: Carcassonne (2000)
Blokus just misses out on our top spot because the evergreen title, Carcassonne, was released in 2000. Polyominoes took some time to catch on, but tile-laying as found in Carcassonne exploded immediately, and it continues to grow today. Carcassonne has spawned numerous expansions, spin-offs, and imitators.
Carcassonne’s gameplay is simple. Draw and place a terrain tile. Station a follower on the newly placed tile (optional), but this shows you claim control of this region. And then score completed feature(s) if relevant. Carcassonne earned the 2001 Spiel des Jahres and Deutscher Spiele Preis award. I don’t know how the Spiel des Jahres committee determines which year a game is eligible. But Carcassonne’s influence can still be felt today. Carcassonne’s core mechanisms inspired 2023’s Spiel des Jahre winner Dorfromantik, and in turn, the award-winning Dorfromantik video game that inspired the board game was also inspired by Carcassonne. Carcassonne is everywhere, people. It even crossed over into video games. And that’s why Carcassonne takes our top spot for 2000.
Did we get the list mostly correct? Let us know which games you’d add in the comments. Thank you for reading, and wherever you are, I hope you’re having a great day.
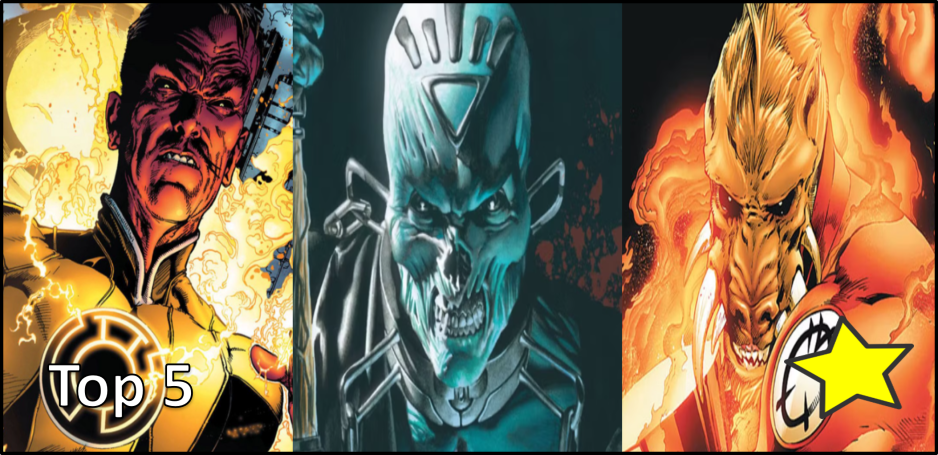
Happy Saturday, Geekly Gang! We haven’t done a Top 5 Villains list for a superhero or superhero group since Black Panther late August of last year. Looks like we’re overdue for another list, and since Lanterns is releasing on HBO Max, let’s count down the Top 5 Green Lantern Villains. Green Lantern is almost on Superman’s level in his number of overpowered villains. Heck, some of these Green Lantern villains have their own Corps of Henchmen ready to take down the Emerald Knight. Let’s see who made our list of Top 5 Green Lantern Villains.
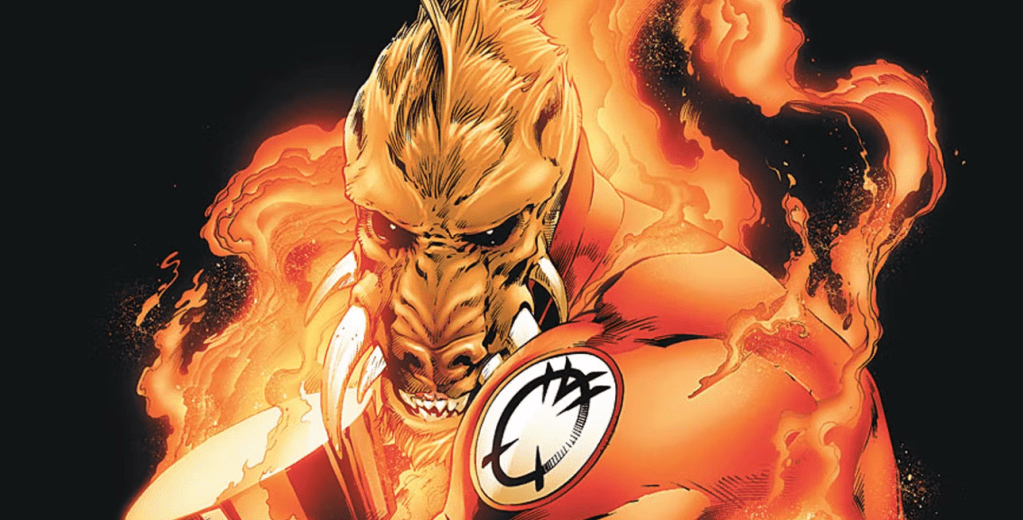
5) Larfleeze
Larfleeze might not make a lot of people’s lists of Top 5 Green Lantern Villains because he’s often depicted as comic relief, but Larfleeze’s origin is anything but comical. Deep within the Vega System, Larfleeze of Okaara protects the DC Universe’s only Orange Lantern Power Battery. Fueled by greed, Larfleeze has a desire to take as much power as he can. Larfleeze would kill anyone he believed was trying to steal his Power Batter, and then copy his victims’ image, stealing their identities and have them join his Orange Corps as construct ghosts.
Larfleeze is the embodiment of greed, the emotional power that feeds orange. Under the Orange Light of Greed’s sway, Larfleeze is driven to possess everything.
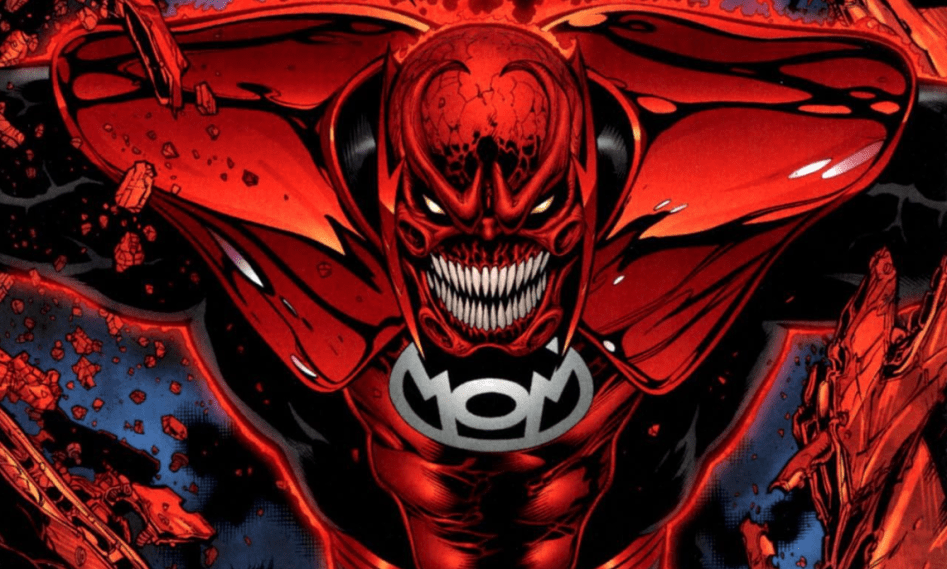
4) Atrocitus
Another one of Geoff Johns’s creations, Atrocitus represents a different Lantern Corps Spectrum: Red’s Wrath. The murderous Atrocitus and his Red Lantern Corps may be the most feared force in the known, extraterrestrial DC Universe.
The Manhunters killed everyone Atrocitus knew. He became an intergalactic terrorist, wanting to kill the Guardians of the Universe. After numerous bloodthirsty missions, Atrocitus formed his Red Lantern Corps to go toe to toe with the Green Lantern Corps. At his core, Atrocitus executes an extreme form of justice. Too bad his form of justice comes with enough blood to paint the universe.
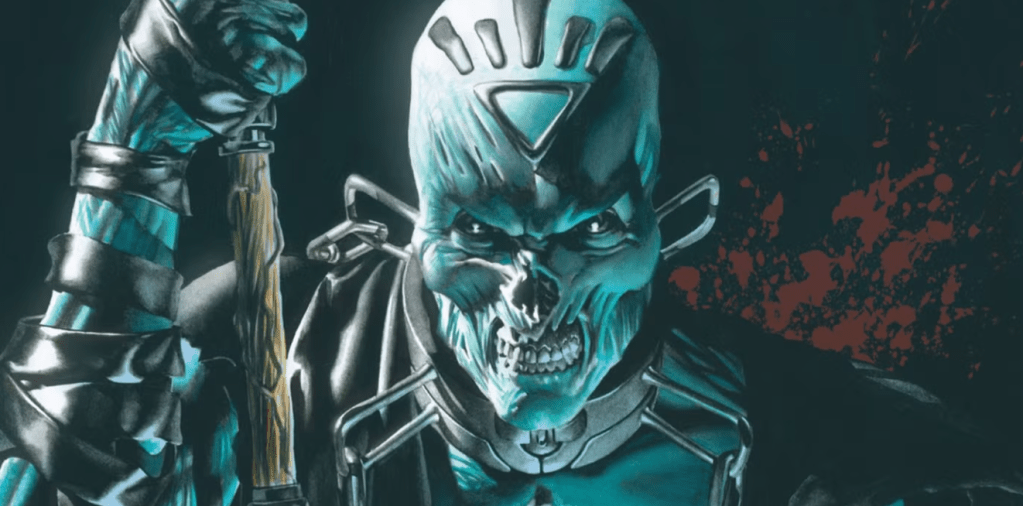
3) Nekron
Nekron is a demon who is DC Comic’s embodiment of Death. Nekron has power over the souls of everyone who has ever died. He uses these souls to perform godlike abilities like strength, durability, and energy projection. Never content with his deathly realm, Nekron seeks control over the rest of the DC Universe.
Nekron’s right-hand agent, Black Hand, almost made this list, too. Consider Black an honorable mention for Green Lantern’s Top 5 Villains. The two of them concocted the events of “Blackest Night.” They co-created the Black Lantern Corps of death. Using the bodies of formerly dead heroes like Superman and Wonder Woman, Nekron attempted to eliminate all life.
2) Parallax
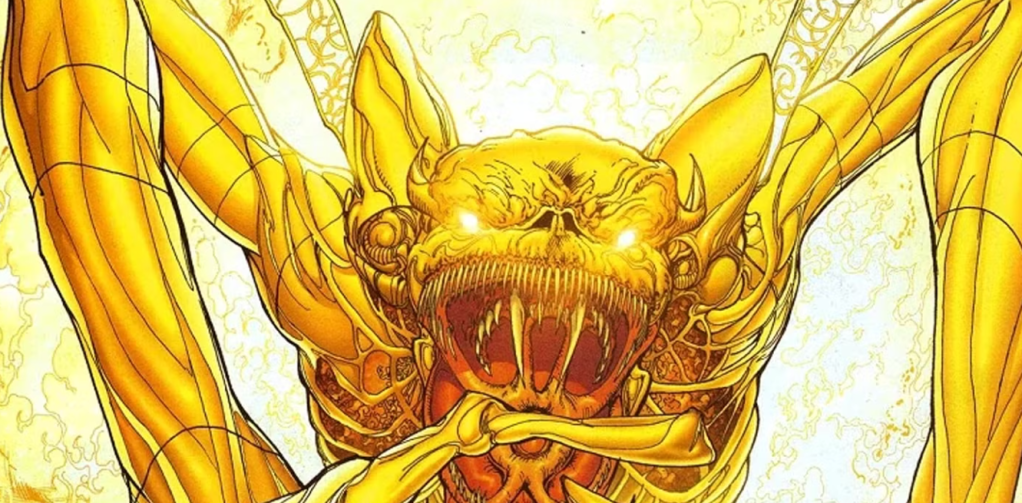
Yellow’s fear runs counter to Green’s will, so spoiler alert, our top two spots belong to Yellow’s portion of the Emotional Spectrum. Parallax is the embodiment of terror. It derives its power from the yellow light of fear, typically presenting itself as a serpentine creature that acts as a parasite in a host’s mind. The most famous instance of a Parallax infection was Hal Jordan.
That’s right. Parallax turned Hal Jordan into a villain. Jordan adopted Parallax as his villainous persona. While under Parallax’s control, Hal Jordan massacred the rest of the Green Lantern Corps and destroyed his home, Coast City. But Jordan is far from Parallax’s only vessels. It’s taken possession of heroes like Kyle Rayner and The Flash. Whenever Parallax takes control of a hero, its malevolent spirit and power turn the poor soul into one of the DC Universe’s most powerful villains.
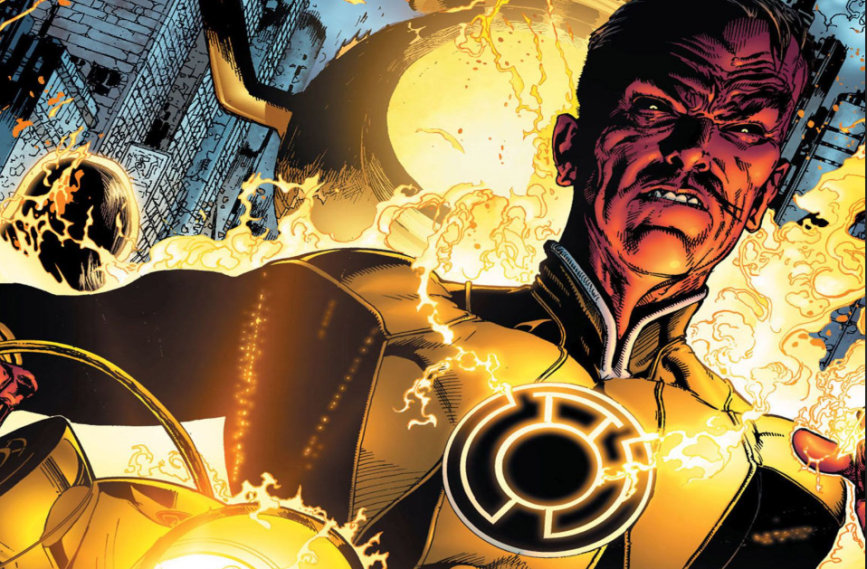
1) Sinestro
While Parallax takes temporary control over its host, Sinestro shows how the yellow light of fear can corrupt even the greatest Green Lanterns, completely and forever. When Hal Jordan first joined the Green Lantern Corps, Thaal Sinestro was his mentor. The two developed a bond, but that bond was shattered when Hal discovered Sinestro kept his sector (of the universe) in line through tyranny.
Jordan got Sinestro booted from the Green Lantern, and the Korugarian never forgave Hal, the Green Lantern Corps, or the Guardians of the Universe. Since his dismissal, Sinestro has been one of the DC Universe’s most enduring antagonists. He’s a card-carrying member of the Legion of Doom and the founder of the Sinestro Corps, who also harnesses the yellow light of fear. While he may occasionally commit acts of valor, Sinestro’s hatred, anger, and desire for power define him. We had to go with Sinestro for the top spot. Sometimes one of a character’s original villains are the best.
There are plenty of other Green Lantern Villains we could’ve added to this list. Who would you include? Let us know in the comments. Thank you for reading, and wherever you are, I hope you’re having a great day.
Spring Meadow is the grand finale of Uwe Rosenberg’s puzzle trilogy of games. It follows 2016’ Cottage Garden and 2017’s Indian Summer. The complexity of this game—the most interactive between the players in the trilogy—is set in between those two games. Hey, hey, Geekly Gang! Kyra Kyle here with another tabletop game review. We’ll be placing oddly shaped polyominoes on wintery player boards in today’s game review, Spring Meadow. Uwe Rosenberg’s final game of his puzzle trilogy marks the end of a harsh winter, and the first delicate flowers bloom. Can you have the lushest meadow? We’ll get to Spring Meadow’s review in a bit, but first, let’s talk about the less picturesque elements of the game and discuss Spring Meadow’s credits.
The Fiddly Bits
Designer: Uwe Rosenberg Publisher: Stronghold Games; Pegasus Spiele; Edition Spielwiese Date Released: 2018 Number of Players: 1-4 Age Range: 8 and up Setup Time: 5-10 minutes Play Time: 15-60 minutes
We’ll be paraphrasing the Spring Meadow rule book. The setup is succinct and easy enough to follow.
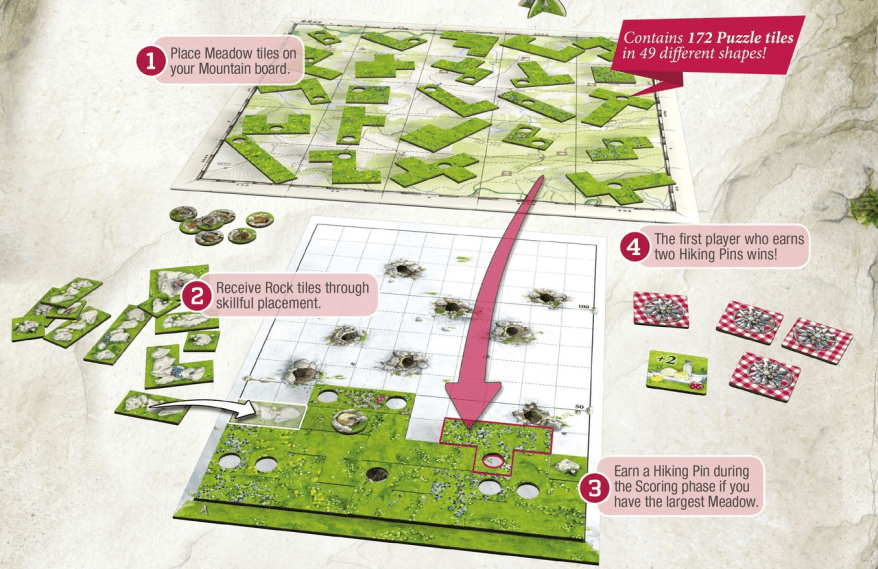
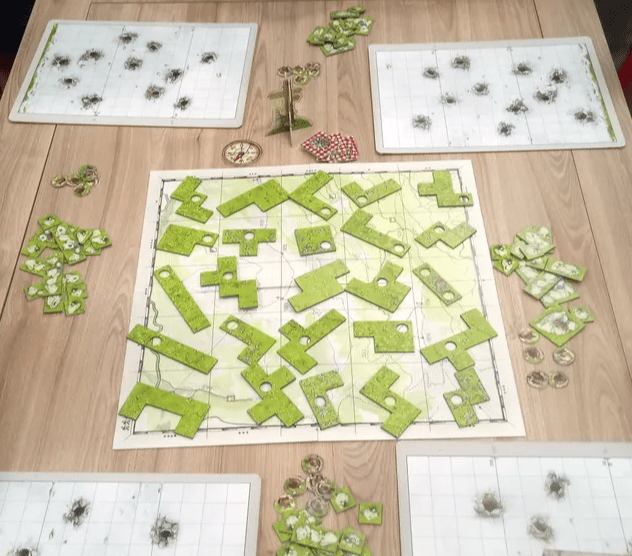
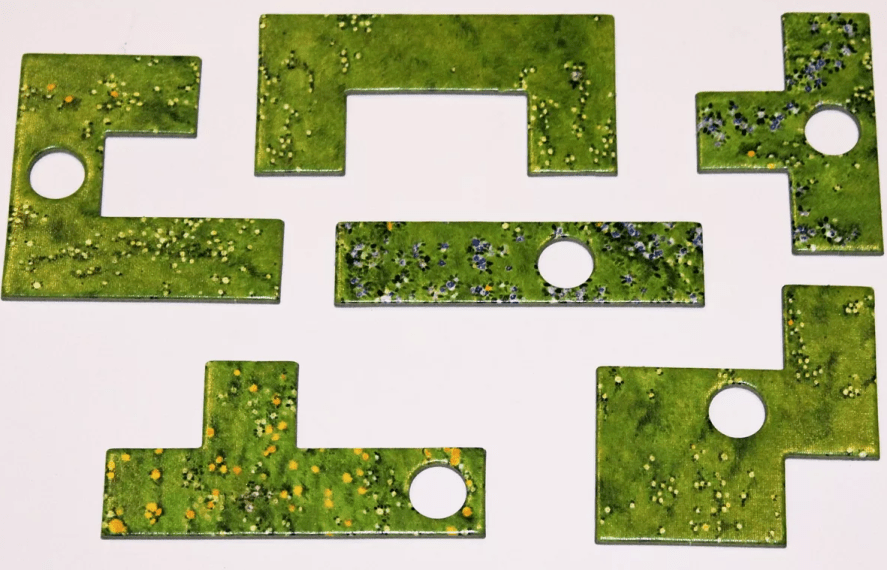
1) Place the double-sided Hiking Map (shared board featuring the offering of polyominoes) that corresponds to the number of players face up in the center of the table.
2) Shuffle all Meadow (polyomino) tiles and randomly place one on each of the 25 spaces of the Hiking Map.
3) Return the remaining Meadow tiles to the box. You will need them later to refill the Hiking Map.
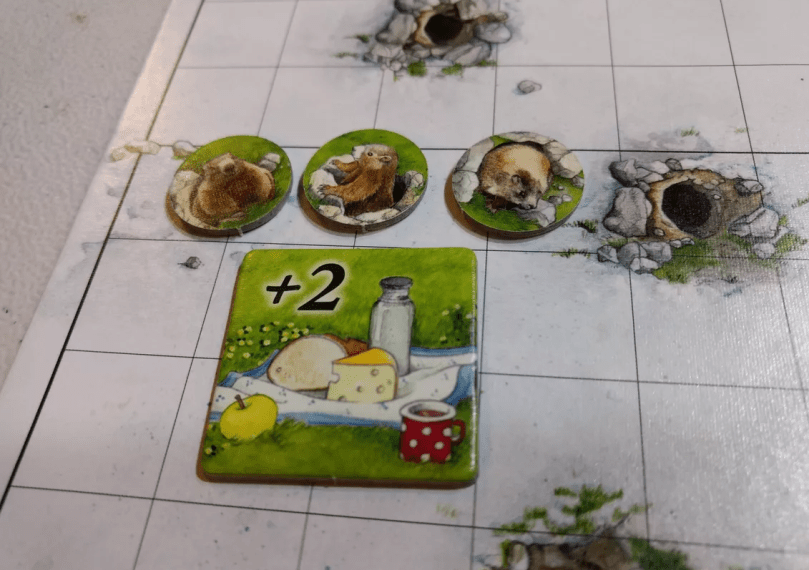
4) Place the Rock tiles, Marmots, Picnics/Hiking Pins, and Compass within reach of the players in a common supply.
5) Place the Signpost next to the player count icon on the Hiking Map.
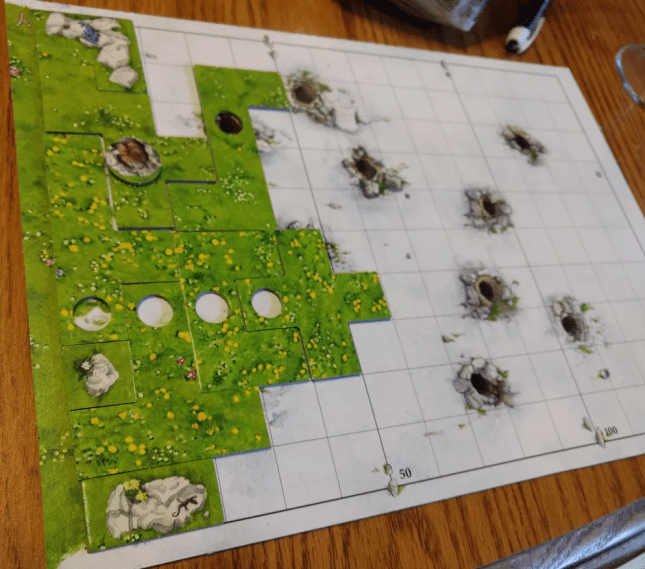
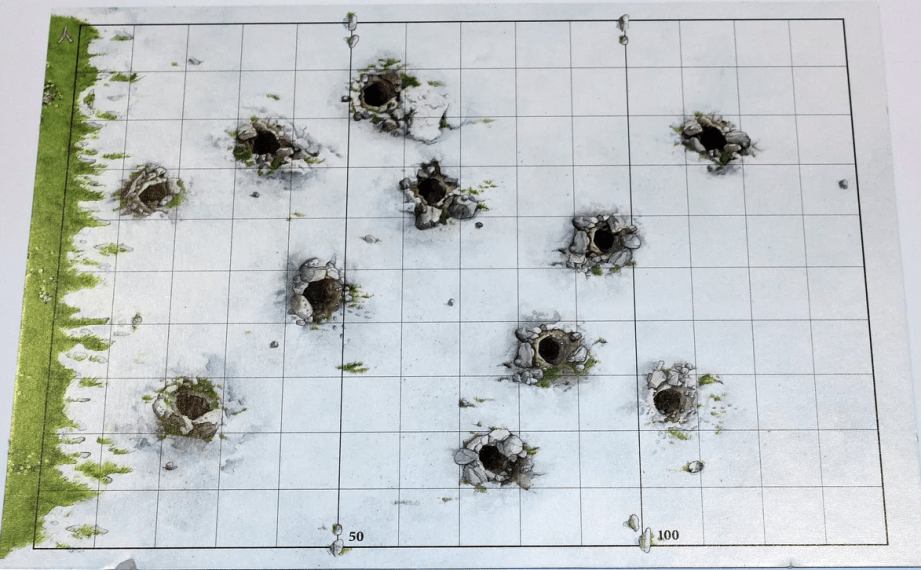
6) Shuffle the double-sided Mountain boards and give one to each player. Orient the Mountain board with the arrow pointing up.
7) Randomly select a starting player. Each successive player will take a Rock tile, the size of which will depend on the player count and the player order.
Game Flow
On a turn, the active player chooses 1 Meadow tile from the Signpost Path (noted by the Signpost pawn, you’ll either select from a row or column of polyominoes, depending on the Signpost’s orientation during your turn) on the Hiking Map. Place the tile on your Mountain board.
Pay attention to the Holes in the Meadow tiles and the Burrows on your Mountain board. Burrows will challenge your puzzle skills and placing adjacent Holes will allow you to place extra Rock tiles on your Mountain board.
If you wish to cover a Burrow, you must place a Marmot over a Burrow that has already been cleared.
When the Signpost stands next to a Signpost Path (column or row) on the Hiking Map containing zero or one Meadow tile(s), a Scoring phase is triggered.
Starting from the bottom of your Mountain board, count all covered spaces up to and including your first incomplete row to tally your score.
The player with the most points earns a Hiking Pin and must place Marmots over all their cleared Burrows (so they cannot score those Burrows again).
Once scoring is completed, refill the Hiking Map with randomly drawn Meadow tiles afterwards.
The first player to earn their second Hiking Pin wins the game.
Review
It took some time for me to get into Spring Meadow. I appreciated Spring Meadow’s theme. There’s something about the earth waking up from a cold winter. One of my favorite things to do during this time is to stop by the Platte River and hear the ice turn into slush and float on by. Spring Meadow gives me those vibes. And I love polyominoes in general, and Spring Meadow uses them in interesting ways. Kind of like a competitive Tetris, where you want to fill the board with as many blocks as possible. But Spring Meadow has a steep learning curve, and if you play with a new player, that can derail the game.
Sure, at one point, I was that new player. The person who taught me the game had a fun enough time, but he didn’t really find enjoyment in playing Spring Meadow until me and another player from my gaming knew had played a handful of games. He told me as much. And I found the same to be true. Spring Meadow feels unforgiving as the “new player,” but as an “experienced player,” I felt as if I was taking advantage of someone else.
While Spring Meadow’s player (Mountain) boards can be oriented in landscape or portrait, I prefer portrait. There isn’t much difference between the two orientations, but portrait clicks a little better with me. Other players in my gaming group said the opposite, so there’s a chance portrait or landscape orientation could benefit one player over another because of how different brains process information. This doesn’t lower Spring Meadow in my estimation, but I had to mention it.
I’m uncertain if Spring Meadow has a runaway leader problem. Certain plays of Spring Meadow devolve into a runaway leader, especially if you have a veteran player against noobs, but evenly skilled players can keep the game close. Still, I don’t think the Marmots covering cleared Burrows is a big enough penalty or catch-up mechanism. Player boards stay the same in between rounds, so if you’re ahead by fifteen points at the end of one round, all other players need to score fifteen more points than the leader during the second round. Good luck with that.
I could see gamers instituting an extra catch-up mechanism of handing players who are behind by more than five points, a one, two, or three rock tile. But that would be a house rule.
I also prefer Spring Meadow with fewer players. The three and four-player variants have one player selecting on the diagonal (instead of a row or column), but it’s the same player picking on the diagonal each time that happens. While picking the Meadow tile you want from a diagonal line may not add extra strategic value for that one player, it feels bad for the players who don’t get to choose from the diagonal, and choosing a tile from a diagonal line gives the illusion of more choice, because you’re literally picking your tile in a manner no one else can.
Despite any minor gripes I may have, I’ve enjoyed my time with Spring Meadow. It’ll be one of those games you’ll need to play multiple times to grasp the game’s nuanced strategy. Fortunately, games of Spring Meadow don’t take that long. Fifteen minutes per player is short. This is another reason why I like playing Spring Meadow with fewer players. A two-player game takes up to thirty minutes. Nice!
Too Long; Didn’t Read
Spring Meadow may have a runaway leader problem, and veteran players have a decided advantage over noobs. But I love the theme and the game uses polyominoes in intriguing ways. Spring Meadow is one of those games you’ll need to play more than once to grapple with its nuanced strategy. Thankfully, games of Spring Meadow don’t take long: fifteen minutes per player.
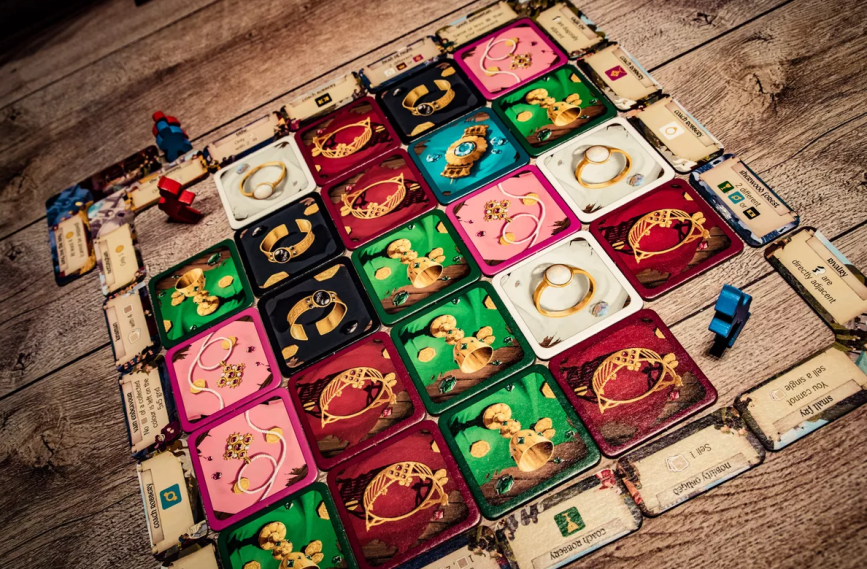
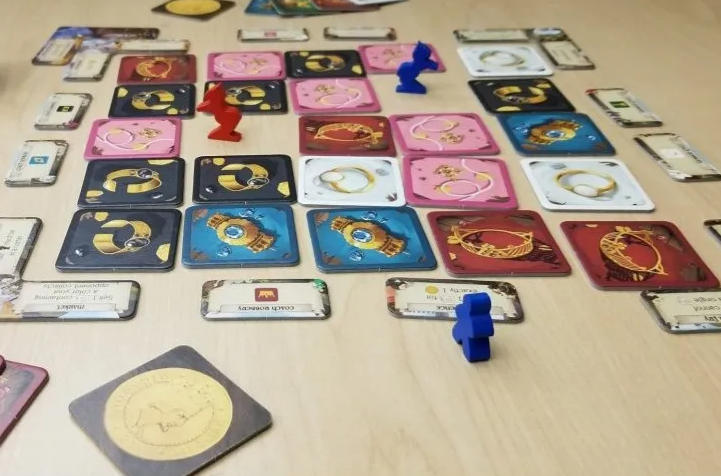
Hey, hey, Geekly Gang! Kyra Kyle here with another board game review. Full disclosure: Today’s game is one of my go-to 2-player board games, Robin of Locksley by Uwe Rosenberg. I’ll try to stay as neutral as possible, but it’ll be difficult. I love this game that functions as a race between two players. You control two pawns, Robin and a Bard. While Robin steals Loot from the rich, that Loot is used to move the Bard on a Race Track. The first player to finish the race wins. We’ll get to the daring do soon, but first, let’s discuss some of the less swashbuckling aspects of Robin of Locksley.
The Fiddly Bits
Designer: Uwe Rosenberg Publisher: Funforge, Rio Grande Games, Wyrmgold GmbH Date Released: 2019 Number of Players: 2 Age Range: 8 and up Setup Time: 5-10 minutes Play Time: 20-30 minutes
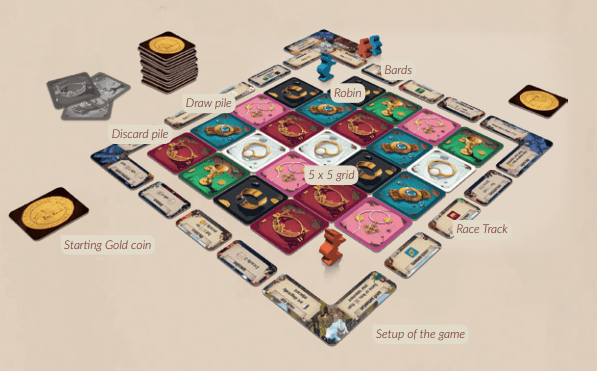
We’ll use Robin of Locksley’s rulebook for this section. I don’t know if words can express how to set up the game. We’ll include the picture the rulebook provides. I always use it when building the board.
* Shuffle all Loot tiles (gold coin side up) and build a 5×5 grid.
* Choose a player to go first. The first player takes one loot tile from any corner of the board. The second player takes the tile from the opposite corner. Each player flips the tile they chose back over to the side showing the gold coin and forms their personal supply.
* The players put their Robins in the now empty corners.
* Place the remaining loot tiles with the gold coin side up in a draw pile.
* Find the corner pieces labelled “The Beginning” (start) and “Long Live the King” (end). Put them together in one of the corners. Place “The Beginning” piece (as shown above) in the inner corner.
* Shuffle the remaining corner pieces, draw three, and put them in the remaining corners.
* The players put their Bards in their color next to the start tile.
* Shuffle the small fame tiles and put three of them between the corners.
* When complete, the game layout should look similar to the picture above.
Game Flow
Moving Robin
* Players alternate turns. The start player begins the game. * Players move their Robin in the shape of an “L” composed of three tiles (just like the knight’s move in Chess).
* The player takes the tile they landed on into their personal supply.
* At the end of their turn, the player fills the now empty space (the space their Robin left) with a Loot tile from the general supply. Do not fill the square occupied by a Robin.
The Racing Track
Players win the game by moving their Bard along the Racing track (the one surrounding the loot tiles). There are two ways to move with your Bard.
1) Every Fame tile (the ones that compose the Racing Track) shows one task. If the player is able to fulfill the task indicated on the Fame tile, they may move their Bard 1 tile forward on the Race Track. These tasks range from possessing a specific color of Loot or having your Robin in the corner of the 5×5 Loot tile grid.
2) The player may spend 1 Gold coin (and discard it to the open discard pile with the Loot side up) to move their Bard 1 tile forward (clockwise) on the Race Track. The player may continue to move their Bard forward as long as they can meet the requirement or pay the bribe for each tile they encounter.
Loot Collection
A Loot collection is a set of 1 or more Loot tiles of the same color. Loot collections may never be split into smaller collections.
Selling a Loot Collection
Anytime during their turn, players may sell a Loot collection which consists of 3 or more Loot tiles of the same type.
Discard two of the Loot tiles on the open discard pile and collect the remaining ones as Gold coins by turning them over.
Game End and Winning
There are two ways the game can end, and a player can win.
1) The game ends immediately if one player’s Bard “laps” the other player’s Bard on the race track. To “lap” the other player, one player’s Bard must have made a full extra lap around the track thus passing the other player’s Bard a second time. The player whose Bard has passed the other is the winner. If both Bards are on the same spot on the Race Track, the game does not end.
2) The player who first completes two full laps of the Race Track and fulfils the challenge on the goal tile is the winner.
Review
I love the way the Robins move. Robin of Locksley’s new players will have an easier time picking up the move mechanisms, but the way knights in Chess move isn’t straightforward. The Robins have familiarity, and each move functions as a spatial puzzle. One of the Fame tiles (the spaces on the Race Track) requires a player’s Robin to be one move away from their opponent. I don’t know how many times I’ve spent a Coin to skip this requirement, but I get a rush every time I can meet that requirement naturally. Then, it becomes a race, so my opponent can’t finish that Fame tile during their next turn.
The Fame tiles have varied requirements. Robin of Locksley’s modular board ensures no two games will ever be the same. And planning spaces ahead is fun, making each turn meaningful, even if your move this turn won’t help you progress right away. Robin of Locksley also has that volta, a turn where the game shifts, and it’s usually during the mid-point. Players bide their time, collecting Loot, meeting easier requirements, and accruing enough Coins to skip five or six spaces on the Race Track during a single turn. I love this volta (turn). As soon as this happens, the race is on. The other player will pop off a five or six spaces of their own, and Robin of Locksley begins in earnest. Typically, this momentum continues until the game ends.
And games of Robin of Locksley don’t take too long. BoardGameGeek and the rules list games as lasting up to 40 minutes. This hasn’t been my experience. My first game of Robin of Locksley may have taken close to 40 minutes (with the teach), but as soon as you have two players who know what they’re doing, turns take no time at all. Sometimes, I must call time and raise my hand if I want to move those five or six spaces in a turn, because it’s easy to get into a rhythm. The game’s rhythm getting interrupted raises the stakes during the volta. It’s so good.
Looking up a Fame tile’s requirement is one of the few ways a game of Robin of Locksley slows. None of the Fame tiles has any text; they’re all conveyed through icons. The Robin of Locksley rulebook contains a glossary of what each icon means, but it will slow down the game to look up that information during your first lap around the Race Track. Despite this occasional slowdown, I like how both game elements work with each other in Robin of Locksley. It’s a healthy balance of figuring out how best to maximize your Loot with your Robin piece and looking ahead on the Race Track to see what you may need.
Robin of Locksley is my go-to 2-player only game. My spouse and I have played a ton of 2-player games lately, but Robin of Locksley is one of the few competitive 2-player-only games that consistently make our rotation.
Too Long; Didn’t Read
Robin of Locksley has short, punchy turns that lead to a satisfying race to meet Loot (or spatial) requirements. With its modular board, each game is unique, but one thing stays constant: the volta (turn). Each game will have an exciting turn where one player moves multiple spaces, and then the race is on.
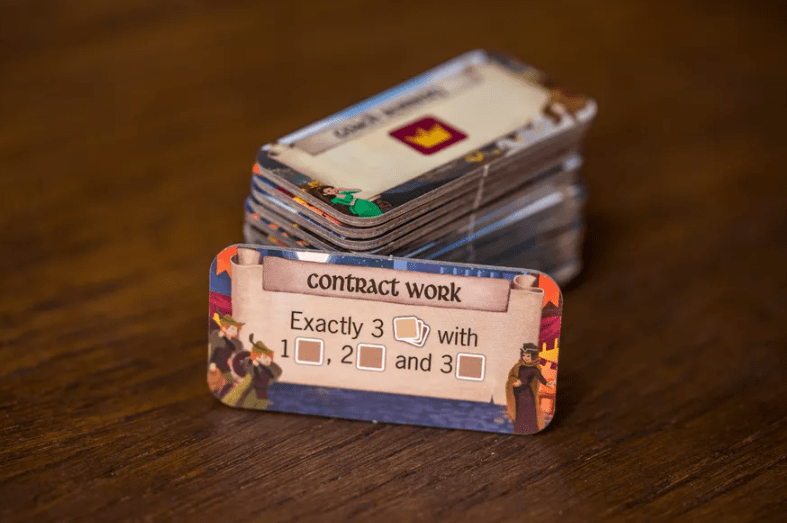
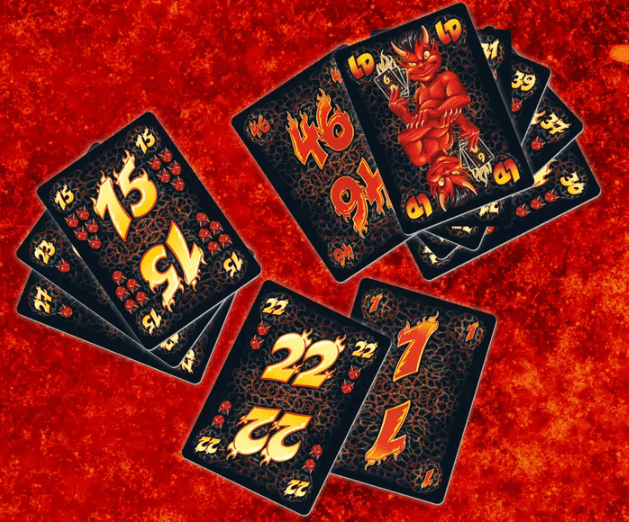
Hey, hey, Geekly Gang! Kyra Kyle here with another board game review. Today’s game is Michael Feldkötter’sLittle Devils, a quick trick-taking game with a twist. Little Devils has no suits. Instead, players must follow the first card (in a series of 54 numbered cards) that’s played per round. The second card dictates which direction every other player must follow (up or down from the original number). The player who either plays in the wrong direction (up instead of down) or plays the furthest number from the original card wins the trick; you’re trying to win as few tricks as possible. Little Devils takes a simple concept and bakes in some interesting choices.
Before we get any further, we’ll get devilish with Little Devils’ details.
The Fiddly Bits
Designer: Michael Feldkötter Publisher: Arclight Games, Stronghold Games, White Goblin Games Date Released: 2012 Number of Players: 3-6 Age Range: 8 and up Setup Time: Less than a minute Play Time: About 15 minutes
Little Devils consists of a 54-card deck. Depending on the number of players, remove a number of cards numbered between 28-54 from the game. The rulebook will state which specific cards need to be removed at each player count. Ultimately, players will be dealt 9 cards each, which should be the entire deck.
After you’ve prepared the deck, deal out all the cards.
Game Flow
For the first round, the player to the left of the dealer begins the trick; for every round after the first, whoever “won” the previous trick, begins the next trick. The first player starts the trick by playing any card from their hand that doesn’t have five little devils beneath the number. Quick note: most cards in Little Devils will have at least one little devil underneath its number. Players cannot lead a trick with a card with five little devils, unless they have no other card in their hand.
The player to the left of the starting player will play a card from their hand. If the second player plays a higher card, all other players must play cards valued higher than the first card if possible. Whoever played the highest card gets the trick, unless a player is unable to play a higher card. This player will get the trick unless more players are unable to play higher cards. If a player (or players) plays a card in the opposite direction of the second player, the player with the furthest valued card from the original card wins the trick.
After all cards have been played, a round ends. Players score the number of little devils from their tricks. As soon as someone scores 200 points, play ends, and whoever has the fewest points wins.
Review
Little Devils has a built-in catch-up mechanism: the player who wins a trick can’t possibly win the next one; they begin the next trick. I love that. It’s simple and offers plenty of strategic choices. I could play a card closer to the low or high end, thinking the players in front of me (on the scoreboard) might get stuck with a trick or two. There are even cards that have no little devils on them. Often, when I know I’m going to get stuck with a trick, I’ll play one of the one devil or no devils cards to net the fewest little devils I can.
While you could card count during Little Devils, it doesn’t matter that much. Little Devils plays quickly. It’s more fun to play a second game. Even when I’ve finished last (triggered the end game), I feel like I did something if I stiffed someone else with a bunch of points during one round. Little Devils is a great filler game. It may get overshadowed by Cat in the Box (we still need to review that game), but it requires less setup, is an easier teach, and I’ve found more gamers catch on to Little Devils a lot faster.
Too Long; Didn’t Read
Quick to pick up and easy to teach, Little Devils is an excellent trick-taking game that offers plenty of strategic choices, a brilliant built-in catch-up mechanism, and fun gotcha moments.
We had to discuss the Marvel United: Fantastic Four expansion from the Marvel United: X-Men launch. In fact, we’ll begin our coverage of the Marvel United: X-Men wave with this expansion. Hey, hey, Geekly Gang! Kyra Kyle here. We return once again to Marvel United. This is one of those game systems with a heap of expansions. Too many, if you ask me. But we’ll cover the expansions that will either be fan favorites (plenty of people will be interested in adding them to their collection) or good additions because of their gameplay variants. Fortunately, Marvel United: Fantastic Four fits both criteria.
We’ll get to Marvel’s first family in a minute, but first, let’s take a look at Marvel United: Fantastic Four’s less heroic details.
The Fiddly Bits
Designer: Andrea Chiarvesio, Eric M. Lang, and Francesco Rugerfred Sedda Publisher: CMON Global Limited and Spin Master Ltd. Date Released: 2022 Number of Players: 1-5 Age Range: 8 and up Setup Time: 5-10 minutes Play Time: 30-40 minutes
We already covered the Game Setup and Game Flow in our original Marvel United review (here’s a link to that review), so we’ll go over the basics in the following two sections. Let’s cover an abbreviated review of the game setup and rules.
Marvel United: Fantastic Four’s setup can change depending on which Villain(s) and Heroes you choose to play. Each game consists of six locations. Since Marvel United: Fantastic Four is an expansion, only includes four locations, and you’ll need a core set in addition to this expansion to play. You may choose your locations or shuffle them and choose six at random. Each Location card has spaces at the top for civilians and thugs, and a rectangle with a block of text that will state “End of Turn” at the top of the box.
Place civilian/thug tokens on their matching spaces. Shuffle the Villain’s Threat deck and deal out each Threat face-up so that it covers the rectangle at the bottom of each location. You must clear this threat before gaining the “End of Turn” effect printed on a Location. Place health tokens where signified on threat cards and on the Villain dashboard. Place the three mission cards (Defeat Thugs, Rescue Civilians, and Clear Threats) face up under the villain dashboard where the text reads “Unlocked.”
Each player shuffles their hero decks and then draws three cards to form their hands. Shuffle the Villain’s Master Plan deck. Leave the Master Plan deck face down. This will be the villain’s draw pile.
Players place their miniatures on one of the six location cards, usually the centralmost location for each player (easy access). Then, they place the villain on the location card opposing the heroes. If one player chooses to play as the villain, hand the Super Villain cards to them, and the Heroes gain access to Super Hero cards. These new card times can be played if the game state triggers their use (for example, “You play a Master Plan card” or “Any Hero has 4 or more cards in their hand at the end of the Hero turn.” Timing is key.
Game Flow
The villain(s) play first. Draw the top card of their master plan deck. The villain moves the number of spaces indicated. Resolve any BAM! Effects and these effects will be printed on a space within the villain’s dashboard. Then, place the civilian/thug tokens (if any) indicated at the bottom of the card. If a player has taken the role of the villain, they get a hand of cards and can choose which card they play. The heroes get their turn after all the villain’s effects are resolved.
Heroes pick which player goes first, and hero turns will continue around the table clockwise. At the beginning of each game, Heroes will get three turns before the villain receives another turn. During their turn, heroes play one card from their hand.
Resolve actions and the symbols printed at the bottom of the hero’s card in any order. The symbols at the bottom of a hero’s card will be shared with the next player, but any printed action will not be shared. Heroes will use these actions to complete missions. The game begins with three missions in play: Defeat Thugs, Rescue Civilians, and Clear Threats. Each mission card will have spaces for the tokens they require to complete. As soon as these spaces are filled, the card is discarded, and the mission is considered complete. Mission cards can be completed in any order.
After the heroes complete the first mission, the villain panics and will act (play a card) every two hero cards instead of every three hero cards. After the heroes complete the second mission, the villain becomes vulnerable to damage. The heroes can complete the third mission, but it isn’t necessary. If the heroes do complete the third mission, each hero immediately draws 1 card, increasing each player’s hand size by one.
Play continues back and forth until either the villain wins (by completing their unique master plan or anyone, heroes or villains, runs out of cards) or the heroes win by dealing enough damage to the villain after the villain becomes vulnerable to damage.
Review
Marvel United: Fantastic Four has a huge legacy to live up to, and it lives up to the hype. I’m writing this review in June 2025, and Marvel United: Fantastic Four’s BGG score is an 8.5 (out of 10). This makes Fantastic Four the highest-rated Marvel United expansion. Yeah. It’s—pardon the pun—fantastic.
While Marvel United: X-Men Blue and Gold Teams features semi-cooperative play (players compete to clear the most goals), and this gives me strong X-Men: Under Siege vibes (a game I have a soft spot for), Fantastic Four introduces the idea of teamwork, and it does so simply and elegantly. Included in the box is a Fantastic Four team card. Various hero cards (from the members of the Fantastic Four) will add action tokens to the card, and can then use all actions on the Fantastic Four team card with different cards in their deck. This promotes a slow build. It simulates teamwork without using a lot of convoluted rules. I like the Team Cards from Marvel United’s third wave (Multiversus), but the method used in Fantastic Four is easy to follow and makes narrative sense.
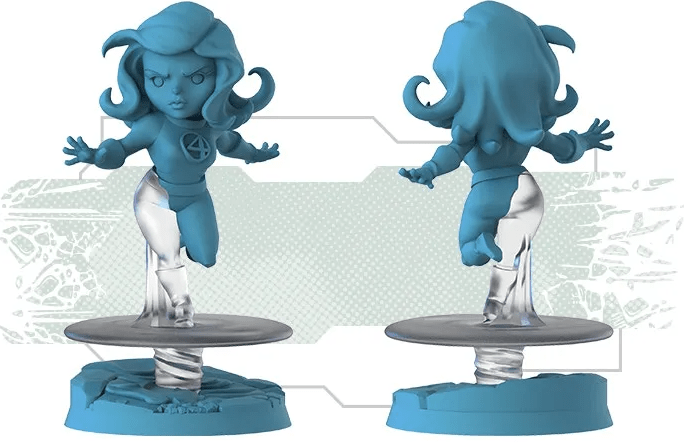
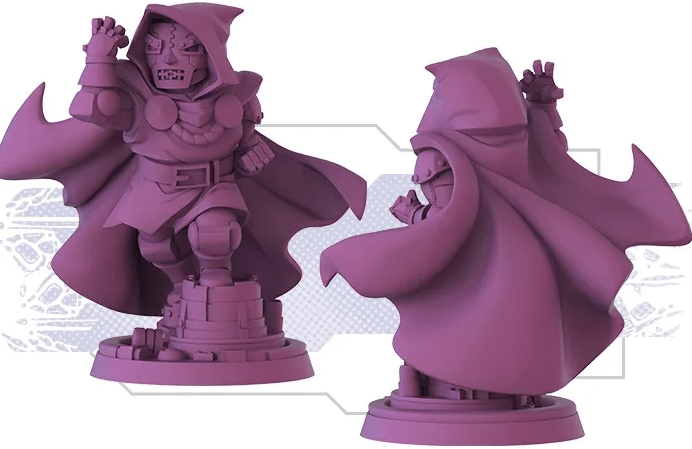
Marvel United: Fantastic Four includes six heroes. One of which is the anti-hero (hero and villain) Doctor Doom. That’s a lot of heroes for one expansion—it’s almost as many as a core box—and each hero illustrates Marvel United’s second wave’s power creep. Granted, to get the most out of the Fantastic Four characters (Mr. Fantastic, Invisible Woman, The Thing, and Human Torch), you’re encouraged to play as the Fantastic Four. The aforementioned Fantastic Four Team Card is amazing, but these characters are still effective outside the team setting.
Each member has a unique flavor. Mr. Fantastic is flexible. Get it? Flexible? Ha…ha. Invisible Woman can avoid damage altogether (using her “Invisiblity” card), but she takes herself out of combat, which makes sense. Human Torch can use Nova Flame and deal 2 damage to everything at his location—super useful. And The Thing deals copious amounts of damage and can ignore 1 damage during each Villain Turn. Very nice.
The remaining two heroes, Doctor Doom and Silver Surfer, don’t gain any benefit from the Fantastic Four team card, but they don’t need it. Doom gets tokens for each damage he takes. He can even use the symbols from the 3 previous Hero cards in the Storyline (instead of the previous one). This can generate as many as seven actions on a single turn. Yikes! Silver Surfer has extra card draw, can move anywhere with one of his special abilities, and can exchange a Location in play with one that isn’t in play. What? Silver Surfer can literally yeet any Location for another Location. That’s coconuts.
But Marvel United: Fantastic Four’s villains are just as overpowered as their hero counterparts. Even though Doctor Doom is the marquee villain, we’ll begin with Super-Skrull. Don’t overlook Super-Skrull. He has one of the more unique Special Rules in Marvel United. Whenever he BAM!s, he performs actions based on the symbols on the last Hero card in the Storyline. The heroes have some control over what Super-Skrull can do, but that doesn’t matter. None of Super-Skrull’s BAM! actions are things you want to happen. Super-Skrull attempts to knock out (KO) and hand each in-play hero a KO token, but this isn’t the only way he can win. Super-Skrull can’t be damage if any Crisis tokens exist, and he adds cards from his deck facedown in the Storyline, which leads to a shortened clock.
Super-Skrull is a spiffier version of Green Goblin. He does enough things well that you must split your focus on the various ways he can win, and even though he doesn’t have Henchmen (like Green Goblin), he makes up for it with crazy Threat card abilities that make clearing Thugs and Civilians less efficient, and each Threat card requires one of each action type. Super-Skrull covers all bases. But most people purchase Marvel United: Fantastic Four for Doctor Doom, and Doom delivers.
First off, Doom must be played with Latveria—naturally—and Latveria is the first Location card that has a negative “End of Turn” effect. In fact, Doom only has five Threat cards because Latveria begins the game without one. Latveria marks the first time Marvel United has included an “End of Turn” effect that benefits the villain. “You MUST take 1 damage for each Thug or Doombot in this Location.” Ouch! Latveria begins every game with three Doombot tokens, so if you don’t take out all of the Doombots, you’re discarding your entire hand. Double ouch! Doom’s Threat cards add extra Doombots (sometimes not even in the same place as the Threat card’s location) and can deal extra damage to heroes. Triple ouch!
As for his Villainous Plot, Doc Doom plays like Red Skull but way, way worse. He can increase the Doom Track (changed from the Red Skull’s Threat Track) far more often, and he can’t be damaged if a Doombot is at his Location. In short, Doctor Doom is nasty. You’ll need the Fantastic Four with their Team Card to defeat him. It can be done, but it’s a tough go. I find Doctor Doom tuned to the perfect level of difficulty. He may be one of the many reasons Marvel United: Fantastic Four is the highest-rated Marvel United expansion.
We talked about Latveria, but there’s another Location, Mount Wundagore, that has a negative “End of Turn” effect: Each Hero in this Location MUST discard all cards in their hand and draw the same number of cards (this does not KO). Even though this effect doesn’t count as a KO, it’s another way to shorten the clock. If anyone (including Heroes) runs out of cards in their deck, the heroes lose. Yowza! I like Marvel United: Fantastic Four’s inclusion of villain-centric Locations. We’ll see more of this later in the series, but villain-centric Locations do a lot to shake up Marvel United’s status quo. The remaining Locations have unique “End of Turn” abilities as well. The Baxter Building provides token draw if the character you’re playing was ever a member of the Fantastic Four. This is a boon for anyone who knows the comics. I appreciate that.
I also appreciate the Takeover Challenge card included in Marvel United: Fantastic Four. If a Thug, Civilian, or Doombot token can’t be added to a Location, after resolving Overflow, place the excess tokens on the Takeover card. If the card is full, Heroes immediately lose. The Takeover card has two sides with different difficulties (number of spots for tokens). This Challenge card, like the Fantastic Four’s Team Card, is simple and elegant. It adds just enough difficulty if the game has gotten too predictable.
Too Long; Didn’t Read
Marvel United: Fantastic Four is the highest-rated Marvel United expansion on BoardGameGeek and for good reason. This expansion adds more layers of complexity while staying thematic and not burdening the player with too many over-complicated rules. Every element from the Locations, the Challenge Card, the Heroes, and especially the Villains is well thought out and an excellent addition to any Marvel United collection.