

Real Name: N’Jadaka (Erik Killmonger)
First Comic Book Appearance: Jungle Action (September 1973)
Affiliations in Comic Books: War Dogs
Marvel United Appearance: Marvel United: Rise of the Black Panther (July 2020)
Marvel United Team Decks: None
Movement

BAM!

Civilians

Thugs

How Killmonger Plays: Killmonger has above average health, so even if the heroes make him vulnerable to damage, you’ll need a lot of damage. His gameplay centers around blocking thug/civilian spaces on Locations with Crisis Tokens and can make the game state difficult to navigate.

Villainous Plot: The Heroes lose when 4 or more Locations have 3 or more Crisis Tokens.
How he does this? Killmonger can place Crisis Tokens in a variety of ways: his BAM! effect, overflow effect, Threats, and Masterplan cards. It’ll be difficult to predict which Locations will get these tokens, so Locations can fill up quickly. You’ll need to move fast and tend to vulnerable Locations.

BAM!: Deal 1 damage to each Hero in Killmonger’s Location. Then, replace the leftmost civilian/thug token there (if present) with a Crisis Token.
Killmonger’s damage isn’t a big issue. But he has ways of supplementing this damage that will make him more likely to KO heroes. The BAM! does require a civilian/thug token to convert into a Crisis Token, so the effect can fizzle. And if the effect does convert a civilian/thug token, it’ll mean that you’ll have one less civilian or thug token to finish the Rescue Civilian or Defeat Thug missions.
Killmonger’s Crisis Token placement can vary wildly from game to game. He could concentrate it in a few locations or spread out the tokens. But there are ways for the tokens to cascade, especially with Killmonger’s Overflow effect.
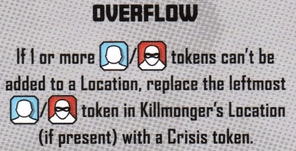
Overflow: If a civilian or thug token can’t be added to a Location, replace the leftmost civilian/thug token in Killmonger’s Location (if present) with a Crisis Token.
Again, this is bad for the reasons mentioned in Killmonger’s BAM! effect. I would suggest playing with the Great Mound Location (included in the Rise of the Black Panther expansion), since its End of Turn ability allows players to discard a Crisis Token.
Threats
Killmonger has 2 copies of 3 different Threat Cards, none of which are henchmen.

Weapon Smuggling (Threat)
Clear: 3 Heroics
Triggered Effect (Killmonger finishes movement on this Location): Place 1 Crisis Token in an empty slot in this Location. If all slots are full, it replaces the leftmost thug/civilian token.
“Weapon Smuggling” is the only effect Killmonger has to add Crisis Tokens to an empty slot. “Weapon Smuggling” is dangerous. It contributes to Killmonger’s win condition and makes overflow easier. A Location can gain 3 tokens if Killmonger lands there (1 from “Weapon Smuggling,” 1 from his BAM! effect, and 1 from overflow. Clear “Weapon Smuggling” as quickly as possible.

Assassination Attempt (Threat)
Clear: 3 Heroics
Constant Effect: Heroes ending their turn in this Location take 1 damage.
“Assassination Attempt” provides more consistent damage than anything players can find in the core set, but it isn’t that deadly.
Note: If you used a Location’s End of Turn ability that can teleport you to another Location, your Hero will skip the window when “Assassination Attempt’s” damage would occur, since they will have ended their turn at a different Location. You can and should use this to your advantage.

Mercenaries (Threat)
Clear: 3 Heroics
Constant Effect: Each thug in this Location requires 2 damage to be defeated
“Mercenaries” uses an effect popular in Marvel United: lower a player’s efficiency. You can clear this threat before attacking thugs.
Master Plan Deck
Movement: Killmonger has the same total movement and distribution of movement as the core set villains. His movement predominantly shows up in three cards. The rest of his movement is 1 and 0 with a couple of 2s thrown in. Since this is the case, Killmonger is predictable in terms of his movement.
Civilians:
Killmonger adds a staggering amount of civilians. Most of these will come in four cards where he places two civilians at his Location and the Locations adjacent to him.
Thugs:
The number and distribution of thugs Killmonger adds is more in line with the core set villains, but sheer number of tokens between civilians/thugs makes Overflow very likely.
BAM!:
Killmonger has BAM! effects on 7 of his 12 cards, so just above half. The combination of him adding so many civilian/thugs and using more BAM! effects to replace civilian/thug tokens into Crisis Tokens plays into his win condition.

Special Effects on Cards
1) Duel: Killmonger has text instead of his usual Move. We’ll begin with his Move text.
Move: Move clockwise to the next Location with any Heroes.
Duel: Deal 2 damage to 1 Hero in Killmonger’s Location (Heroes choose).
Most damage sources don’t deal 2 damage in a single shot. And the ones that did deal 2 damage in the core set (like Crossbones) could be avoided. There is no avoiding “Duel.” One Hero will receive 2 damage. Thankfully, there are only 2 copies of “Duel” in Killmonger’s deck.
If players stick together, “Duel” isn’t as deadly. The player with the most health can guard players with less. The problem comes when players split their party and the combination of “Duel” and Killmonger’s “Assassination Attempt” Threats.
2) Overthrow: Move to the closest Location with the most civilian tokens and replace all civilian tokens there with Crisis Tokens. If there are no civilian tokens in any Location, move to the next one clockwise.
Like “Duel,” Killmonger has 2 copies of “Overthrow” is his deck. You’ll need to be careful with the amount of civilian tokens are on the board until both copies of “Overthrow” have been played. Also like “Duel,” “Overthrow’s” effect will most likely happen; it’ll trigger if ANY civilian tokens are in play. And keep in mind that Killmonger can place a heap of civilian tokens in a single turn.
General Strategy
Since Killmonger adds so many civilians and all his Threat cards require Heroics, you’ll want to play Heroes with high Heroics. But Killmonger also has a ton of health. So, you’ll also want Heroes who can deal a lot of damage in a single action and have those Heroes save their Attack after Killmonger is vulnerable.
Killmonger will frequently add Crisis Tokens to Locations, but he needs to place 3 each on 4 different Locations to win. It’s the luck of the draw as to how he’ll add Crisis Tokens. I suggest prioritizing “Weapon Smuggling” Threats and large groups of civilians who could be converted with Killmonger’s “Overthrow.” I’d also ignore the Defeat Thugs mission and complete the Clear Threats and Rescue Civilians missions, saving your Attack for Killmonger himself.
If you’re playing with the Great Mound Location, be sure to clear whatever Threat card is on that card so you’ll have its End of Turn ability to discard Crisis Tokens. Shuri also works extremely well in conjunction with Great Mound. In fact, the three Heroes included in the Rise of the Black Panther expansion work well as a team and against Killmonger. Black Panther has plenty of Move for players to move to Locations with a lot civilians, and Winter Soldier can bank Attack tokens to unleash them on Killmonger when the time is right.
Remember to time completing the first and second missions as close together as possible to avoid the villain speeding up too soon.
